Why Is My Pressure Washer Leaking Water? Causes, Troubleshooting, and How to Fix It
Pressure Washer Leaking Water ? Here’s How to Find and Fix the Problem
A pressure washer is one of the most useful outdoor cleaning tools you can own. Whether you’re washing your driveway, cleaning siding, restoring a deck, or detailing your vehicle, a pressure washer saves time while delivering professional-quality results.
But nothing is more frustrating than noticing water dripping from underneath the machine, spraying from unexpected places, or pooling around the pump before you even start cleaning.
If your pressure washer is leaking water, don’t panic. In many cases, the problem is surprisingly simple—a worn O-ring, loose hose connection, cracked fitting, or faulty seal. Even leaks from the pump can often be repaired without replacing the entire machine.
This guide walks you through everything you need to know about diagnosing and fixing a leaking pressure washer. Whether you own an electric or gas-powered model, you’ll learn:
- Why your pressure washer is leaking
- Which leaks are normal and which require immediate attention
- How to identify the exact source of the leak
- The most common causes and their solutions
- When you can repair the washer yourself
- When it’s time to replace the pump or seek professional service
By the end of this guide, you’ll have a clear understanding of what’s causing the leak and how to get your pressure washer back to peak performance.
How Does a Pressure Washer Work?
Understanding how water flows through a pressure washer makes troubleshooting much easier.
A pressure washer operates by taking water from a garden hose and forcing it through a pump at extremely high pressure. That pressurized water then travels through the high-pressure hose and exits through a spray nozzle, creating the powerful cleaning stream.
The basic water path looks like this:
Garden Hose → Water Inlet → Pump → High-Pressure Hose → Spray Gun → Nozzle
Along this path are several components designed to keep water contained, including:
- Rubber O-rings
- Pump seals
- Check valves
- Hose fittings
- Quick-connect couplers
- Pressure relief valves
- Thermal relief valve (on many gas models)
Every one of these components can wear out over time. Even a tiny crack or flattened seal can allow water to escape.
The good news is that most leaks originate from just a handful of common locations.
Is It Normal for a Pressure Washer to Leak Water?
One of the most common questions new owners ask is whether any water leakage is normal.
The answer depends on where the water is coming from and when it’s leaking.
Normal Water Drips
These situations are generally harmless:
- A few drops when disconnecting the garden hose
- Residual water draining after use
- Small drips from the spray gun after releasing the trigger
- Water left inside the hose emptying during storage
These aren’t signs of a malfunction.
Leaks That Need Attention
You should investigate immediately if your pressure washer:
- Continuously leaks while connected to water
- Drips heavily from underneath the pump
- Leaks even when turned off
- Sprays water from hose connections
- Loses pressure while leaking
- Produces puddles after only a few minutes of use
Ignoring these symptoms can lead to pump damage, corrosion, reduced cleaning performance, and costly repairs.
Where Is Your Pressure Washer Leaking?
Before replacing parts, determine the exact location of the leak.
Different leak locations usually indicate different problems.
| Leak Location | Most Likely Cause | Difficulty |
|---|---|---|
| Water inlet | Loose garden hose, damaged screen, bad O-ring | Easy |
| High-pressure hose | Cracked hose or worn fitting | Easy |
| Spray gun | Worn trigger valve or seal | Easy |
| Quick-connect fitting | Dirty or damaged O-ring | Easy |
| Pump head | Failed seals or cracked manifold | Moderate |
| Bottom of pump | Worn pistons or oil seals | Moderate to Difficult |
| Thermal relief valve | Valve opening from overheating | Easy |
| Pressure regulator | Loose fitting or worn seal | Moderate |
Finding the exact source first prevents unnecessary repairs.
12 Common Causes of a Pressure Washer Leaking Water
Let’s look at the most common reasons a pressure washer develops leaks.
1. Loose Garden Hose Connection
This is by far the most common cause.
The garden hose must create a watertight seal against the water inlet. If the fitting isn’t tightened completely, water escapes around the threads.
Symptoms
- Water leaking where the garden hose connects
- Dripping before the machine starts
- Small spray while operating
Why It Happens
- Loose connection
- Cross-threaded fitting
- Missing rubber washer
- Damaged hose threads
Quick Fix
- Disconnect the hose.
- Inspect the rubber washer.
- Reconnect carefully.
- Hand-tighten securely.
- Avoid overtightening plastic fittings.
2. Worn or Missing O-Rings
Nearly every pressure washer connection uses rubber O-rings to create a watertight seal.
Over time they become:
- Flattened
- Cracked
- Brittle
- Torn
- Missing altogether
Once this happens, water escapes under pressure.
Common Leak Locations
- Garden hose inlet
- Spray gun
- Quick-connect fittings
- Pressure hose
- Wand connection
Symptoms
- Water sprays from fittings
- Leaks worsen under pressure
- Connections appear loose
Solution
Replace the damaged O-ring with the exact size recommended by the manufacturer.
Always apply a small amount of silicone plumber’s grease before installing a new O-ring to reduce wear and make future removal easier.
3. Damaged High-Pressure Hose
High-pressure hoses operate under thousands of PSI.
After years of use, they can develop:
- Pinholes
- Cracks
- Bulges
- Split outer jackets
- Internal failures
Even a tiny puncture can produce a powerful stream of water.
Warning Signs
- Water spraying sideways
- Wet hose exterior
- Visible bulges
- Pressure loss
- Hose vibration
Important Safety Note
Never attempt to repair a high-pressure hose with duct tape, glue, epoxy, or hose clamps. Because these hoses operate at extremely high pressure, temporary fixes can fail suddenly and create a serious injection injury hazard.
Replace a damaged hose with one that matches your pressure washer’s pressure (PSI) and flow (GPM) ratings.
4. Cracked Pump Manifold
The pump manifold is one of the most expensive components on a pressure washer.
It distributes pressurized water throughout the pump assembly.
Unfortunately, it can crack due to:
- Freezing temperatures
- Accidental drops
- Excessive pressure
- Manufacturing defects
- Long-term fatigue
Symptoms
- Water leaking from the pump body
- Leak increases while running
- Visible crack in the housing
- Reduced pressure
Can It Be Repaired?
Small external cracks are sometimes repaired temporarily with specialized epoxy, but this is rarely a permanent solution. In most cases, replacing the manifold or the complete pump assembly is the most reliable fix.
5. Failed Pump Seals
Every pressure washer pump contains multiple water seals that prevent high-pressure water from escaping.
These seals wear over time due to:
- Dirt
- Mineral deposits
- Heat
- Age
- Lack of lubrication
Once they fail, water begins leaking from the pump housing.
Signs
- Water dripping underneath
- Leak increases with pressure
- Oil contamination (on serviceable pumps)
- Reduced cleaning performance
Seal replacement is often possible on premium pumps but may not be economical on lower-cost consumer models.
6. Faulty Quick-Connect Couplers
Quick-connect fittings make changing accessories easy, but they’re also a frequent source of leaks.
Common causes include:
- Dirt inside the coupler
- Rust
- Bent locking balls
- Damaged internal O-ring
- Poor-quality aftermarket fittings
Symptoms
- Water sprays around the fitting
- Coupler won’t lock securely
- Hose disconnects unexpectedly
Cleaning the fitting and replacing the internal O-ring usually solves the problem.
7. Thermal Relief Valve Opening
Many gas-powered pressure washers include a thermal relief valve to protect the pump from overheating.
If you leave the engine running without squeezing the trigger for several minutes, water trapped inside the pump heats up. Once it reaches a certain temperature, the thermal relief valve opens automatically and releases hot water.
Symptoms
- Water dripping from the bottom of the pump
- Leak occurs only after idling
- Stops after using the spray gun
This behavior is normal. However, if the valve continues leaking during regular operation, it may need replacement.
8. Loose Pump Fittings
Vibration from normal operation can gradually loosen threaded fittings around the pump.
Symptoms
- Water appears around brass fittings
- Leak increases during operation
- No visible cracks
Inspect each fitting and tighten it carefully using the correct wrench. Avoid overtightening, especially on aluminum or plastic pump housings, as this can strip threads or crack components.
9. Cracked Water Inlet
The garden hose connection can crack if:
- The washer is dropped
- The hose is forced sideways
- The fitting freezes with water inside
- Plastic becomes brittle with age
Symptoms
- Leak begins immediately after turning on the water supply
- Water escapes around the inlet fitting
- Cracks are often visible
Minor damage may require replacing the inlet fitting, while more extensive cracks can mean replacing the pump housing.
10. Worn Trigger Gun Seals
The spray gun contains several small seals that experience constant pressure changes every time you pull and release the trigger.
Over time these seals wear out.
Symptoms
- Water dripping from the trigger area
- Leaks near the wand connection
- Trigger feels loose
- Constant dripping after releasing the trigger
Many manufacturers sell inexpensive repair kits, though replacing the entire spray gun is often the quickest and most cost-effective option.
11. Frozen Pump Damage
One of the most preventable causes of pressure washer leaks is freezing.
When water is left inside the pump during winter, it expands as it freezes. This expansion can crack manifolds, damage seals, and split fittings.
Signs of Freeze Damage
- Large cracks in the pump
- Multiple leak locations
- Sudden pressure loss
- Water pours from the pump as soon as the water supply is turned on
Proper winterization—including draining the system and using pump antifreeze where recommended—can prevent this costly damage.
12. Excessive Water Pressure from the Supply
Most residential pressure washers are designed for standard household water pressure. If the incoming water pressure is unusually high or fluctuates significantly, seals and fittings can experience additional stress.
Symptoms
- Leaks develop shortly after connecting the water supply
- Multiple fittings begin dripping
- Previously repaired seals fail again
If you suspect high supply pressure, check your home’s water pressure with a gauge. Installing a pressure regulator may help protect not only your pressure washer but also your plumbing system.
Early Warning Signs You Shouldn’t Ignore
Pressure washer leaks rarely appear without warning. Paying attention to these early symptoms can help you prevent more expensive repairs later.
Watch for:
- Small drips that gradually become steady leaks
- Reduced spray pressure
- Frequent cycling of the pump
- Water collecting beneath the machine after use
- Visible corrosion around fittings
- Unusual noises coming from the pump
- Difficulty maintaining consistent pressure
- Wet or damaged hose connections
Addressing these issues early can often mean replacing a low-cost seal instead of an entire pump.
Step-by-Step Pressure Washer Leak Diagnosis
Instead of randomly replacing components, work through this checklist in order. It can save you time, money, and frustration.
Step 1: Disconnect the Pressure Washer
Before inspecting the machine:
- Turn the pressure washer OFF.
- Shut off the garden hose.
- Pull the trigger to release trapped pressure.
- Disconnect the spark plug wire (gas models).
- Unplug the power cord (electric models).
This prevents accidental startup and reduces the risk of injury.
Step 2: Dry the Entire Machine
Leaks are difficult to trace when everything is already wet.
Use a clean towel or compressed air to dry:
- Pump housing
- Water inlet
- High-pressure hose
- Spray gun
- Hose connections
- Quick-connect fittings
Starting with a dry machine makes fresh leaks much easier to spot.
Step 3: Turn On the Water Only
Don’t start the engine or electric motor yet.
Simply connect the garden hose and turn on the water supply.
Observe the machine for one to two minutes.
If It Leaks Now…
The problem is likely:
- Water inlet fitting
- Garden hose connection
- Pump manifold
- Internal seals
- Cracked housing
If No Leak Appears…
Start the pressure washer and continue to the next step.
Step 4: Start the Pressure Washer
Run the machine normally while watching every connection.
Pay attention to:
- Pump body
- Spray gun
- Hose fittings
- Pressure hose
- Wand
- Thermal relief valve
A flashlight helps identify small leaks.
Step 5: Pull the Trigger
Some leaks only appear when the pump builds pressure.
Operate the spray gun while watching for:
- Water spraying sideways
- Dripping underneath
- Leaking hose connections
- Pump seepage
- Wand leaks
Pressure-related leaks often indicate worn seals or damaged hoses.
Step 6: Observe When the Leak Happens
Ask yourself:
| Leak Timing | Possible Cause |
|---|---|
| Before startup | Hose connection, inlet fitting |
| While running | Pump seals, hose, spray gun |
| Only under pressure | O-rings, hose damage |
| After releasing trigger | Unloader valve, spray gun |
| While sitting idle | Internal check valve or seal |
| After several minutes | Thermal relief valve |
Timing is one of the best clues when diagnosing pressure washer leaks.
How to Fix Common Pressure Washer Leaks
Let’s examine each repair in detail.
Fix 1: Repair a Leaking Garden Hose Connection
Tools Needed
- Adjustable wrench
- Replacement hose washer
- Silicone grease
Repair Steps
- Disconnect the garden hose.
- Remove the rubber washer.
- Inspect for cracks or flattening.
- Replace if damaged.
- Clean the inlet threads.
- Apply a small amount of silicone grease.
- Reconnect securely.
Estimated Cost
- Washer: $1–$3
- Repair Time: 5 minutes
Fix 2: Replace a Damaged O-Ring
A worn O-ring is responsible for a large percentage of pressure washer leaks.
Symptoms
- Water spraying around fittings
- Small drips under pressure
- Loose quick-connects
Replacement Procedure
- Remove the fitting.
- Carefully pry out the old O-ring.
- Clean the groove.
- Lubricate the new O-ring with silicone grease.
- Install the replacement.
- Reassemble and test.
Never use petroleum jelly or automotive grease, as these can damage rubber seals.
Fix 3: Repair a Leaking High-Pressure Hose
Inspect the entire hose carefully.
Look for:
- Cuts
- Bulges
- Abrasion
- Pinholes
- Loose fittings
Can It Be Patched?
No.
High-pressure hoses operate at thousands of PSI.
Any patch can fail violently.
Always replace damaged hoses with ones that match your machine’s pressure (PSI) and flow (GPM) ratings.
Fix 4: Tighten Loose Pump Connections
Pump vibration gradually loosens fittings.
Procedure
- Inspect every threaded connection.
- Tighten gently.
- Do not overtighten aluminum fittings.
- Check again after testing.
If tightening doesn’t stop the leak, replace the sealing washer or O-ring.
Fix 5: Replace Pump Seals
Pump seals eventually wear out.
Signs include:
- Water dripping from underneath
- Water entering the crankcase (serviceable pumps)
- Reduced pressure
Basic Procedure
- Remove the pump.
- Open the pump housing.
- Remove old seals.
- Clean the seal seats.
- Install new seals.
- Reassemble carefully.
Seal replacement kits typically cost $20–$60, but the repair requires mechanical experience and access to the correct parts.
Fix 6: Replace the Thermal Relief Valve
If the valve leaks continuously rather than only after prolonged idling:
- Remove the old valve.
- Apply thread sealant if specified by the manufacturer.
- Install a new valve.
- Tighten securely.
- Test under normal operating conditions.
Replacement valves are generally inexpensive and easy to install.
Fix 7: Repair Spray Gun Leaks
Leaks near the trigger usually indicate:
- Trigger valve failure
- Internal seal wear
- Cracked housing
Many spray guns are inexpensive enough that replacing the entire assembly is often more practical than rebuilding it.
Fix 8: Replace a Cracked Pump Manifold
Unfortunately, cracked manifolds rarely provide a long-term repair.
If the crack resulted from freezing or impact damage:
- Replace the manifold if available.
- Replace the complete pump if parts are unavailable.
Temporary epoxy repairs may slow the leak but should not be considered permanent, especially for high-pressure components.
Pressure Washer Leaking from the Bottom
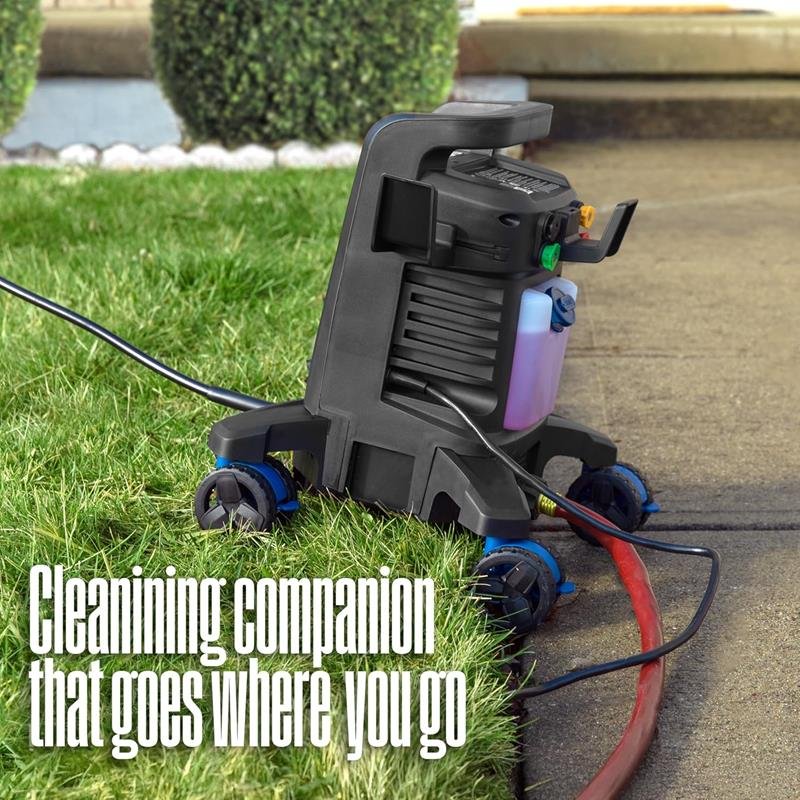
One of the most common complaints is:
“My pressure washer is leaking water from underneath.”
Possible causes include:
- Pump seals
- Thermal relief valve
- Cracked manifold
- Loose pump fittings
- Internal piston seals
- Water inlet damage
How to Narrow It Down
If the leak starts:
Immediately after connecting water
→ Check the inlet and manifold.
Only while spraying
→ Suspect pump seals.
After several minutes of idling
→ Inspect the thermal relief valve.
Pressure Washer Leaking Water When Turned Off
If water continues dripping after shutting down, several issues may be responsible.
Common Causes
- Internal check valve stuck open
- Residual pressure bleeding off
- Damaged pump seal
- Spray gun valve leaking
- Cracked manifold
A few drops after disconnecting the hose are normal. Continuous dripping for hours is not.
Pressure Washer Losing Pressure and Leaking Water
When leakage is accompanied by weak spray pressure, the problem usually extends beyond a simple fitting.
Possible causes include:
- Worn pump seals
- Air entering through leaking fittings
- Cracked pump housing
- Failed unloader valve
- Damaged pistons
- Internal valve wear
In this situation, repairing the leak often restores normal pressure.
Electric Pressure Washer Leaking Water
Electric pressure washers have fewer moving parts than gas models, but they still develop leaks.
Most common causes include:
- Worn inlet O-rings
- Pump seal failure
- Cracked plastic manifold
- Loose quick-connect fitting
- Damaged outlet connection
Because many consumer electric models use sealed pumps, replacing the entire pump assembly may be more practical than attempting an internal rebuild.
Gas Pressure Washer Leaking Water
Gas pressure washers operate at higher pressures and often include additional components.
Common leak points include:
- Thermal relief valve
- Brass pump manifold
- Pressure regulator
- Unloader valve
- Water seals
- Oil seals
- Hose fittings
Routine maintenance significantly extends the life of these components.
Brand-Specific Troubleshooting
Although most pressure washers work similarly, some brands have recurring issues.
Simpson Pressure Washer Leaking Water
Check:
- AAA or OEM pump seals
- Thermal relief valve
- Brass manifold fittings
- Unloader valve
Many Simpson units use serviceable pumps, making seal replacement a viable repair.
Ryobi Pressure Washer Leaking Water
Common problems include:
- Inlet O-rings
- Plastic manifold cracks
- Quick-connect fittings
- Hose couplers
Inspect plastic components closely for hairline cracks.
Sun Joe Pressure Washer Leaking
Frequently reported issues:
- Pump outlet fittings
- Plastic housing cracks
- Wand O-rings
- Trigger gun seals
Because many Sun Joe pumps are sealed, replacing the pump may be the simplest solution if internal seals fail.
Greenworks Pressure Washer Leaking
Typical leak sources:
- Water inlet connection
- Outlet fitting
- Internal pump seals
- Hose connector O-rings
Always verify that accessories are fully seated and compatible.
Craftsman Pressure Washer Leaking
Inspect:
- Brass fittings
- Pump head
- Spray gun
- Hose connections
- Pressure regulator
Older Craftsman models with brass pumps are often worth repairing.
DeWalt Pressure Washer Leaking
Potential issues include:
- Thermal relief valve
- Pump manifold
- Hose fittings
- Seal wear after extended commercial use
Regular oil changes (where applicable) help prolong pump life.
Preventing Future Pressure Washer Leaks
Most leaks are preventable with routine maintenance.
Follow these best practices:
Inspect O-Rings Regularly
Replace flattened or cracked O-rings before they begin leaking.
Never Store Water Inside the Pump
After each use:
- Disconnect the water supply.
- Squeeze the trigger.
- Drain remaining water.
This reduces corrosion and freeze damage.
Winterize Before Freezing Weather
If temperatures may fall below freezing:
- Drain the pump completely.
- Use pump saver or antifreeze if recommended.
- Store the pressure washer indoors.
Freeze damage is one of the leading causes of cracked pump housings.
Avoid Dry Running
Never operate a pressure washer without an adequate water supply.
Running the pump dry can overheat seals and damage internal components within minutes.
Inspect Hoses Before Every Use
Look for:
- Bulges
- Abrasion
- Cracks
- Loose fittings
Replacing a worn hose early is safer and less expensive than dealing with a sudden rupture.
Keep the Water Inlet Screen Clean
A clogged inlet screen restricts water flow and increases stress on the pump.
Rinse the screen periodically to remove sand, debris, and mineral buildup.
Repair Costs: What Should You Expect?
| Repair | Typical Cost (Parts) | DIY Difficulty |
|---|---|---|
| Replace hose washer | $1–$3 | Very Easy |
| Replace O-ring | $2–$10 | Very Easy |
| Replace quick-connect fitting | $10–$20 | Easy |
| Replace high-pressure hose | $25–$80 | Easy |
| Replace spray gun | $20–$60 | Easy |
| Replace thermal relief valve | $15–$40 | Easy |
| Replace pump seals | $20–$60 | Moderate |
| Replace pump manifold | $80–$180 | Moderate |
| Replace complete pump | $120–$350+ | Moderate |
Keep in mind that labor charges at a repair shop can significantly increase the total cost, especially for pump rebuilds.
When Should You Replace Instead of Repair?
Repairs make sense when:
- The machine is relatively new.
- Only seals, O-rings, or fittings are leaking.
- Replacement parts are readily available.
- The motor or engine is in good condition.
Consider replacing the pressure washer if:
- The pump housing is severely cracked.
- Multiple internal components have failed.
- Repair costs approach the price of a new unit.
- Replacement parts have been discontinued.
- The machine has recurring leaks despite repeated repairs.
A good rule of thumb is that if the repair cost exceeds about half the price of a comparable new pressure washer, replacement may offer better long-term value.
Pressure Washer Maintenance Schedule
Routine maintenance is the easiest way to prevent leaks and expensive repairs. Use the following schedule to keep your machine operating efficiently.
| Maintenance Task | After Every Use | Monthly | Every Season | Annually |
|---|---|---|---|---|
| Check hose connections | ✔ | |||
| Inspect O-rings | ✔ | ✔ | ||
| Clean inlet filter | ✔ | |||
| Check for leaks | ✔ | |||
| Inspect spray nozzle | ✔ | |||
| Lubricate O-rings | ✔ | |||
| Inspect high-pressure hose | ✔ | ✔ | ||
| Change pump oil (if applicable) | ✔ | |||
| Inspect pump seals | ✔ | |||
| Winterize machine | ✔ | |||
| Replace worn O-rings | ✔ (or as needed) |
Even spending five minutes on inspection after each use can prevent major pump damage later.
Proper Storage to Prevent Water Leaks
Improper storage is one of the leading causes of pressure washer leaks, especially in regions with cold winters.
After Every Use
Follow these simple steps:
- Turn off the engine or motor.
- Shut off the water supply.
- Squeeze the trigger to release pressure.
- Disconnect the garden hose.
- Disconnect the high-pressure hose.
- Drain all remaining water.
- Store accessories indoors.
Never leave water trapped inside the pump.
Winter Storage
Freezing water expands and can crack:
- Pump manifolds
- Water inlets
- Outlet fittings
- Pressure regulators
- Internal seals
To winterize your pressure washer:
- Drain all water from the pump and hoses.
- Run pump saver antifreeze if recommended by the manufacturer.
- Store the machine in a dry, heated area.
- Keep hoses loosely coiled to prevent kinks.
- Protect fittings from dirt and moisture.
Winterizing takes only a few minutes but can save hundreds of dollars in repairs.
Common Mistakes That Cause Pressure Washer Leaks
Many leaks develop because of avoidable user errors.
1. Running the Pump Without Water
Starting a pressure washer before turning on the water supply can quickly overheat internal seals and damage the pump.
Always connect the water source and purge air from the system before starting the machine.
2. Ignoring Small Drips
A minor leak today can become a major repair tomorrow.
Small drips often indicate:
- Worn O-rings
- Loose fittings
- Early seal failure
Replacing inexpensive parts early can prevent damage to more costly components.
3. Using the Wrong Replacement Parts
Not all hoses, O-rings, and fittings are interchangeable.
Using the wrong size can result in:
- Persistent leaks
- Pressure loss
- Connection failures
Always verify the correct specifications for your pressure washer model.
4. Over-Tightening Plastic Fittings
Many electric pressure washers use plastic components.
Applying excessive force can:
- Crack fittings
- Strip threads
- Damage manifolds
Tighten connections firmly by hand or according to the manufacturer’s recommendations.
5. Skipping the Inlet Filter
The water inlet screen prevents dirt and debris from entering the pump.
Operating without it allows abrasive particles to wear:
- Pump seals
- Check valves
- Pistons
Clean or replace the inlet filter regularly.
6. Leaving the Pressure Washer Pressurized
After finishing your cleaning job, release trapped pressure by squeezing the trigger with the machine turned off and the water supply disconnected.
Leaving pressure inside the system places unnecessary stress on seals and fittings.
7. Using Damaged Hoses
Never continue using a hose that has:
- Bulges
- Cuts
- Deep abrasions
- Loose fittings
High-pressure hose failures can be dangerous and should always be addressed by replacing the hose.
Pressure Washer Leak Prevention Checklist
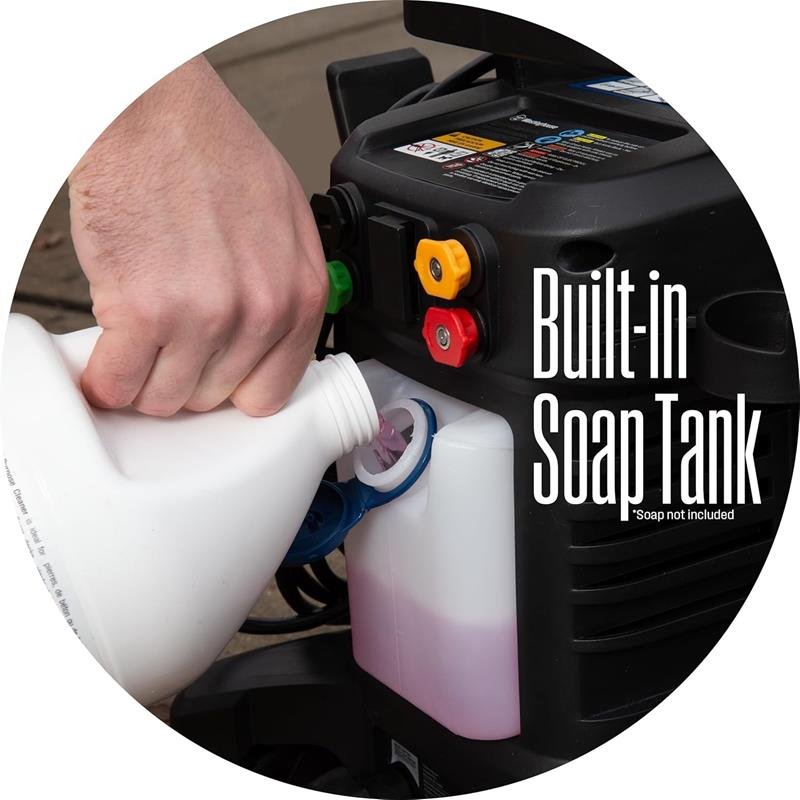
Use this quick checklist before each cleaning session.
✔ Inspect the garden hose washer
✔ Check all O-rings
✔ Tighten hose connections
✔ Clean the inlet screen
✔ Inspect the spray nozzle
✔ Examine the high-pressure hose
✔ Verify there are no visible cracks
✔ Ensure adequate water supply
✔ Check for oil leaks (serviceable pumps)
✔ Test for leaks before beginning your cleaning project
Pressure Washer Safety Tips
Repairing a pressure washer requires caution because water under high pressure can cause serious injuries.
Always follow these safety guidelines.
Disconnect Power
Before performing any maintenance:
- Unplug electric models.
- Disconnect the spark plug on gas models.
Release System Pressure
Always squeeze the trigger after shutting down the machine to relieve trapped pressure before disconnecting hoses.
Wear Safety Gear
Recommended protective equipment includes:
- Safety glasses
- Waterproof gloves
- Closed-toe shoes
If you’re replacing parts, avoid loose clothing that could become caught on moving components.
Never Point the Spray Gun at Yourself
Even if you suspect low pressure, never test the spray with your hand or another person.
High-pressure water can penetrate the skin and requires immediate medical attention.
Use Genuine Replacement Parts
Quality replacement parts are more likely to provide a reliable seal and maintain the pressure washer’s performance.
Whenever possible, choose components that meet the manufacturer’s specifications.
Quick Troubleshooting Chart
Use this chart for fast diagnosis.
| Symptom | Most Likely Cause | Recommended Solution |
|---|---|---|
| Water leaking at inlet | Worn washer or loose hose | Replace washer and tighten connection |
| Leak from quick-connect | Damaged O-ring | Replace O-ring |
| Water under pump | Pump seal failure | Replace seals or rebuild pump |
| Leak after idling | Thermal relief valve | Resume spraying or replace valve if faulty |
| Spray gun leaking | Worn trigger seal | Replace spray gun or repair kit |
| Water spraying from hose | Damaged hose | Replace hose |
| Pump leaking immediately | Cracked manifold | Replace manifold or pump |
| Low pressure with leaks | Internal seal failure | Inspect pump seals and valves |
| Constant dripping when off | Check valve or internal seal | Inspect and repair pump components |
Frequently Asked Questions
Why is my pressure washer leaking water from the bottom?
Common causes include worn pump seals, a faulty thermal relief valve, loose pump fittings, or a cracked manifold. Identifying exactly where the leak starts will help determine the correct repair.
Is it normal for a pressure washer to drip water after use?
Yes. A small amount of residual water may drain from the hose or spray gun after the machine is turned off. Continuous leaking or puddling is not normal and should be investigated.
Can I still use a pressure washer that is leaking?
It depends on the severity of the leak. Minor leaks from a hose connection may only require a new washer or O-ring. However, leaks from the pump or high-pressure hose should be repaired before further use to avoid equipment damage and safety risks.
Why does my pressure washer leak only when I pull the trigger?
This usually indicates a problem with a pressurized component, such as a worn O-ring, damaged hose, failing pump seal, or leaking spray gun.
Why is my pressure washer leaking even when it’s turned off?
Water may continue leaking because of a damaged internal check valve, worn seals, or a cracked pump housing. A few residual drops are normal, but continuous dripping is not.
Can I repair a cracked pressure washer pump?
Small cosmetic cracks may sometimes be temporarily sealed with specialized epoxy, but high-pressure components generally require replacement for a reliable and safe repair.
How often should I replace O-rings?
Inspect O-rings regularly and replace them whenever they become flattened, cracked, brittle, or damaged. Heavy users may replace them every year, while occasional users may get several years of service.
Why is my pressure washer leaking after winter?
Freeze damage is one of the most common causes. Water left inside the pump expands as it freezes, potentially cracking manifolds, fittings, and seals.
Should I rebuild the pump or replace it?
If your pressure washer has a high-quality serviceable pump and the motor or engine is in good condition, rebuilding the pump may be worthwhile. For lower-cost consumer models with sealed pumps, replacing the entire pump or the machine may be more economical.
How long should a pressure washer pump last?
With proper maintenance, many residential pumps last 500–1,000 hours, while premium commercial pumps can last significantly longer. Regular inspections, proper storage, and timely seal replacement help maximize service life.
Final Thoughts
A leaking pressure washer doesn’t always mean the machine is nearing the end of its life. In many cases, the problem is as simple as a worn O-ring, loose fitting, or damaged hose—repairs that are inexpensive and easy to complete.
The key to a successful repair is diagnosing the exact source of the leak before replacing parts. By inspecting the machine carefully, following a systematic troubleshooting process, and addressing small issues early, you can often restore full performance while avoiding more costly damage.
Regular maintenance also plays a major role in preventing leaks. Cleaning the inlet filter, checking hoses and fittings, lubricating O-rings, draining water after each use, and winterizing the pump before freezing weather can dramatically extend the life of your pressure washer.
Whether you own a compact electric model for occasional household cleaning or a heavy-duty gas-powered machine for demanding jobs, a little preventive care goes a long way. Keeping your pressure washer leak-free not only protects your investment but also ensures safer, more reliable performance every time you pull the trigger.
Key Takeaways
- Most pressure washer leaks are caused by worn O-rings, loose fittings, damaged hoses, or failing pump seals.
- Always identify the exact leak location before replacing parts.
- Small leaks should be repaired promptly to prevent larger, more expensive failures.
- Never attempt to patch a high-pressure hose—replace it instead.
- Drain and winterize your pressure washer before freezing temperatures to avoid cracked pump components.
- Routine inspections and maintenance are the best defense against future leaks.