Impact Driver Bit Stuck: Quick Fixes That Work
An impact driver bit stuck usually results from a locked chuck, damaged bit, rust, or excess torque.
An impact driver bit stuck in the chuck can stop a simple repair in its tracks. The good news is that most stuck bits can be removed safely with the right steps, without damaging the tool or your hand.
This guide explains why an impact driver bit gets stuck, how to remove it, when to stop forcing it, and how to prevent the problem next time. The advice is based on common tool design, safe workshop practice, and lessons learned from real repair jobs.
What Causes an Impact Driver Bit to Get Stuck?
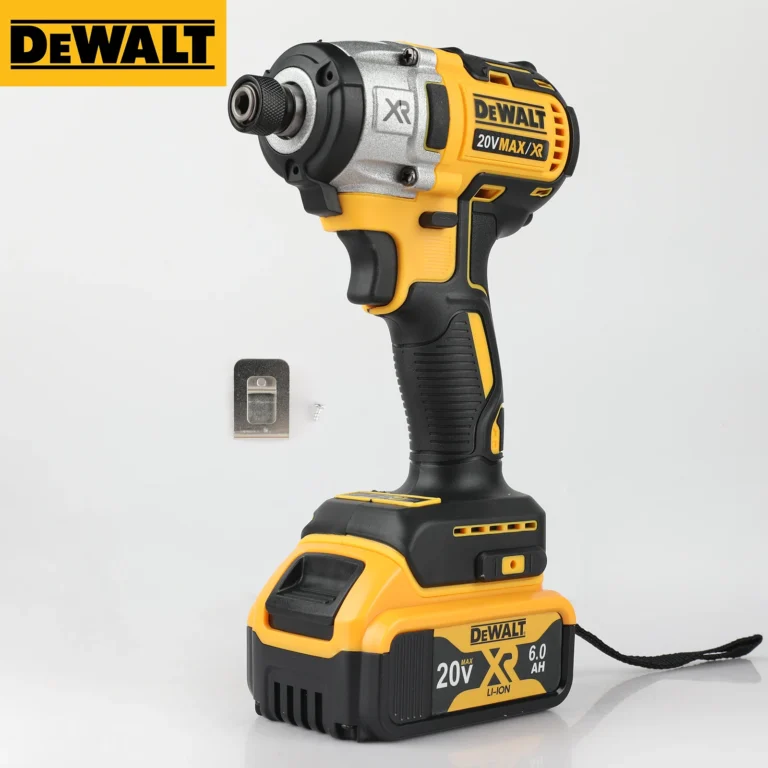
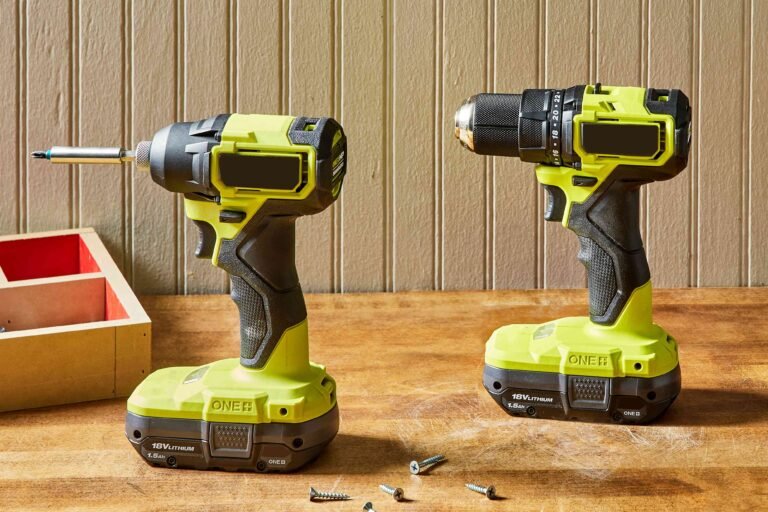
An impact driver uses a spring-loaded hex chuck to hold bits. The chuck must slide forward and backward freely. When dirt, rust, heat, or high torque affects that movement, the bit may remain locked.
An impact driver bit stuck in the chuck does not always mean the tool is broken. Often, the bit is simply wedged against the locking collar or held by debris inside the chuck.
Common causes include:
• A damaged or bent bit
• A bit with rounded hex edges
• Dust and metal chips inside the chuck
• Rust or dried lubricant
• A bit inserted too deeply
• A locking collar that cannot slide
• Excessive torque during use
• Heat from long or heavy work
• A low-quality bit that expands or deforms
The most common mistake is pulling harder while pressing the trigger. That can increase the grip on the bit and may damage the chuck, bit, or motor.

How to Tell Why the Bit Is Stuck
Before removing an impact driver bit stuck in the chuck, inspect the tool carefully. Disconnect the battery first. This prevents accidental activation while your fingers are near the chuck.
Look at the bit and chuck from all sides. Check for metal dust, rust, cracks, or a bent shaft. Also, notice whether the locking collar moves at all.
Basic inspection checklist
• Remove the battery from the impact driver.
• Wipe the chuck with a clean cloth.
• Pull the locking collar forward and release it.
• Check whether the bit moves slightly.
• Look for damage around the bit’s hex shank.
• Listen for grinding or clicking when the collar moves.
If the collar slides normally but the bit will not come out, the bit is likely wedged. If the collar does not move, dirt, rust, or internal damage may be the main cause.
A small amount of movement is useful. Rock the bit gently from side to side while pulling the collar forward. Do not twist it with pliers yet, because sharp jaws can crush the bit or damage the chuck.

How to Remove an Impact Driver Bit Stuck in the Chuck
Use the least aggressive method first. Most stuck bits come out with patience and light movement.
Method 1: Pull the collar and wiggle the bit
-
Remove the battery from the tool.
-
Hold the impact driver firmly with the chuck pointing away from you.
-
Pull the locking collar toward the front of the tool.
-
Keep the collar pulled forward.
-
Wiggle the bit gently while pulling it straight out.
-
Release the collar once the bit comes free.
This method works when the bit is caught against the locking balls inside the chuck. Keep the movement small. A sharp twist can make the problem worse.
Method 2: Tap the chuck lightly
If the bit will not move, pull the collar forward and tap the side of the chuck lightly with a plastic-handled screwdriver or rubber mallet.
Do not hit the chuck with a steel hammer. A hard strike can damage the internal spring, collar, or retaining parts. Use several light taps rather than one strong blow.
Method 3: Apply a small amount of penetrating oil
For rust or dried dirt, place one small drop of penetrating oil around the chuck opening. Let it work for several minutes, then move the collar repeatedly.
Keep oil away from the motor vents and battery contacts. After the bit comes out, clean the chuck well. Too much oil can attract dust and create a gritty paste inside the mechanism.
Method 4: Use locking pliers carefully
If the bit is damaged and still will not come out, clamp locking pliers onto the exposed part of the bit. Protect the chuck with a thin piece of leather or thick cloth.
Pull straight while holding the locking collar forward. Do not squeeze the pliers against the chuck body. If the bit breaks, the remaining piece may require professional service.
Method 5: Use a vise as a last resort
A vise can help with a severely stuck impact driver bit, but it requires care. Clamp the bit gently, not the tool body, and pull the driver straight away from the bit.
Do not place the battery in the tool during this process. Stop if the chuck begins to bend, crack, or separate from the nose of the driver.

What Not to Do When an Impact Driver Bit Is Stuck
Forcing the problem often causes more damage than the original fault. An impact driver chuck has small springs and locking balls that can be displaced by rough handling.
Avoid these actions:
• Do not pull the trigger while holding the bit.
• Do not strike the chuck with a steel hammer.
• Do not heat the chuck with a torch or heat gun.
• Do not twist the chuck with a pipe wrench.
• Do not spray large amounts of oil into the tool.
• Do not use your teeth or bare fingers to pull a sharp bit.
• Do not keep using a bit with a cracked or rounded shank.
Heat is especially risky. High heat can damage plastic parts, internal grease, seals, and nearby electronics. It may also weaken the bit and cause it to snap.
A common workshop lesson is simple: if a bit needs extreme force, the tool needs diagnosis, not more power. Slow pressure and good lighting are safer than rushing.

How to Prevent an Impact Driver Bit From Getting Stuck
Prevention starts with the bit. Use bits made for impact tools, not ordinary drill bits designed for low-speed drills. Impact-rated bits have a more flexible design that helps them handle repeated shock loads.
Clean the bit before inserting it. Dirt on the hex shank can enter the chuck and block the locking mechanism. Push the bit in firmly, then pull it back slightly to confirm that the locking balls have engaged.
Good habits include:
• Use the correct impact-rated bit.
• Replace bits with rounded corners.
• Keep the chuck free from dust and metal chips.
• Avoid forcing a bit into a dirty chuck.
• Do not overload a small bit on large fasteners.
• Let the tool cool during long jobs.
• Store the driver in a dry place.
• Check the collar after heavy use.
Some users add oil every time they change a bit. That is usually unnecessary. A clean and dry chuck often works better because excess oil holds abrasive dust.

Choosing Better Bits for an Impact Driver
The right bit can greatly reduce the chance of an impact driver bit stuck problem. Look for bits labeled impact-rated or made for use with impact drivers.
These bits often use a torsion zone. This section flexes slightly under sudden torque. It helps reduce stress near the tip and hex shank.
Choose the bit based on the fastener:
• Use Phillips bits for Phillips screws.
• Use Pozidriv bits for Pozidriv screws.
• Use Torx bits for star-shaped fasteners.
• Use square bits for Robertson screws.
• Use nut-setter bits for hex-head screws.
A poor fit causes slipping. Slipping creates heat, rounds the bit, and can jam the damaged shank in the chuck. For example, a Phillips bit used on a Pozidriv screw may appear to fit but can quickly lose grip.
Bit length also matters. Long bits create more leverage and may bend under side pressure. Use the shortest bit that gives you safe access to the fastener.

When Should You Replace the Chuck?
An impact driver bit stuck problem may point to a worn chuck when it happens often. A healthy chuck should lock bits securely and release them with a smooth collar movement.
Consider chuck repair or replacement if:
• The collar stays loose.
• Bits fall out during normal use.
• The chuck jams repeatedly.
• The locking balls are missing.
• The chuck wobbles during rotation.
• The nose has visible cracks.
• A new bit will not lock securely.
A chuck replacement may be practical on a high-quality tool. On a low-cost model, professional repair may cost close to the price of a replacement driver.
Do not open the tool unless you understand its construction and can safely handle springs and small parts. Some models also require special retaining rings or manufacturer-specific service parts.

Safety Tips for Removing a Stuck Bit
Safety matters because a stuck bit can release suddenly. Wear safety glasses, especially when using pliers, tapping the chuck, or working with a damaged bit.
Keep the tool pointed away from your body. Hold the bit with a cloth when possible, and avoid placing your hand directly in front of the chuck.
Use these safety steps:
• Remove the battery before inspection.
• Wear eye protection.
• Use gloves when handling sharp or broken bits.
• Work on a stable bench.
• Keep children and pets away from the work area.
• Stop if the chuck becomes hot or begins to smoke.
If the bit breaks inside the chuck, do not drill into the chuck blindly. Small metal fragments can damage internal parts. A tool repair shop can often remove the fragment without replacing the entire driver.

Common Mistakes That Make the Problem Worse
One mistake is gripping the entire chuck with pliers and twisting hard. This can bend the chuck or damage the driver’s spindle. It also makes future bit changes difficult.
Another mistake is using the impact function to shake the bit loose. The impact mechanism is designed to drive fasteners, not repair a jammed chuck. Shock loads may push the bit deeper into the locking mechanism.
People also forget to check the bit itself. A bit with a mushroomed end, twisted shaft, or damaged groove may be physically trapped. In that case, the bit should be removed carefully and discarded.
Take a short pause before using force. Good lighting, a clean work surface, and the right tool often solve an impact driver bit stuck issue faster than brute strength.

Frequently Asked Questions About Impact Driver Bit Stuck
Why is my impact driver bit stuck?
The bit may be stuck because of dirt, rust, a damaged hex shank, or pressure on the chuck’s locking balls. Remove the battery, pull the collar forward, and gently wiggle the bit straight out.
Can I use WD-40 on a stuck impact driver bit?
A small amount of penetrating oil may help loosen rust or dried debris. Keep it away from the motor and battery contacts, and clean the chuck after removing the bit.
Should I use pliers to remove a stuck bit?
Pliers can help if part of the bit is exposed, but use them gently and pull straight. Protect the chuck with a cloth, and avoid crushing or twisting the bit.
Can an impact driver bit get stuck because it is too short?
A short bit can be difficult to grip if it sits deeply inside the chuck. It may not be the direct cause, but limited exposed length makes removal harder.
Is a stuck bit a sign that my impact driver is broken?
Not always. If the collar moves smoothly and the problem happens once, dirt or a damaged bit may be responsible; repeated jams, wobble, or a loose chuck suggest internal wear.
Can I use heat to remove a stuck bit?
Avoid using heat because it can damage plastic components, grease, seals, and electronics. Light tapping, cleaning, and controlled pulling are safer methods.
How do I stop bits from getting stuck again?
Use impact-rated bits, keep the chuck clean, replace worn bits, and avoid side pressure. Insert each bit fully, then pull it back slightly to confirm that it has locked correctly.
Conclusion
An impact driver bit stuck in the chuck is usually caused by dirt, rust, damage, excess torque, or a worn locking mechanism. Start by removing the battery, cleaning the chuck, pulling the collar forward, and gently wiggling the bit. Use oil, light tapping, or pliers only when needed, and avoid heat or extreme force.
The best prevention is simple: use quality impact-rated bits, keep the chuck clean, and replace damaged bits early. If the problem repeats or the chuck wobbles, stop using the tool and have it inspected. Share your own repair experience in the comments, or explore more tool-care guides before your next project.