Air Compressor Won’t Fill Tank: Causes And Fixes
An air compressor won't fill the tank when air leaks out, intake flow is blocked, or the pump cannot build pressure.
An air compressor won't fill tank problems can feel confusing, especially when the motor runs but the pressure gauge barely moves. In most cases, the fault is linked to a closed valve, a damaged check valve, a clogged air filter, a leaking hose, or worn pump parts. This guide explains how to find the cause safely, test each part, and decide whether you need a simple fix or professional service.
Why an Air Compressor Won’t Fill the Tank
An air compressor fills its tank by pulling air through an intake filter, compressing it with a pump, and pushing it through a check valve into the receiver tank. If any part of this path fails, the motor may run without raising tank pressure.
The problem may appear in several ways:
• The motor runs, but the tank pressure stays near zero.
• The compressor fills very slowly.
• The compressor reaches a low pressure, then stops building.
• Air blows from the intake filter or unloader valve.
• The motor hums, trips the breaker, or shuts down.
• The tank loses pressure soon after the compressor stops.
A small amount of air loss is normal when the pressure switch unloads the pump after shutdown. A steady hiss while the compressor is running is not normal. Think of the system like filling a tire with a hand pump. If the pump has a hole, the valve leaks, or the hose is blocked, your effort will not create pressure.
Safety Checks Before Troubleshooting
Compressed air stores a large amount of energy. A tank, hose, or fitting can cause serious injury if it fails or releases pressure suddenly. Work slowly and follow the safety instructions in the compressor manual.
Before inspecting the machine:
- Turn the compressor off.
- Unplug it or disconnect the electrical supply.
- Close the outlet valve.
- Drain the tank until the pressure gauge reads zero.
- Wait for hot parts to cool.
- Wear safety glasses and hearing protection.
- Never remove a check valve, pressure switch, or tank fitting under pressure.
Do not test for leaks with your hands. High-pressure air can enter the skin or damage your eyes. Use soapy water instead, and keep your face away from fittings.
Never weld, drill, or modify an air receiver tank. Corrosion can weaken the tank from inside. If you see deep rust, bulges, cracks, or damage near a weld, stop using the compressor and have the tank inspected by a qualified technician.
Electrical work also needs care. A faulty capacitor, pressure switch, or motor may involve dangerous voltage even after the compressor is switched off. If you are not trained to test electrical parts, contact a licensed professional.

Common Reasons an Air Compressor Won’t Fill Tank
A closed outlet valve
A closed outlet valve does not always stop the tank from filling, but it can confuse the diagnosis. Check the valve between the tank and the air hose. Make sure it is open when you test the compressor.
If the valve is damaged inside, it may restrict flow. Remove the hose only after draining the tank, then inspect the valve for dirt or broken parts.
A leaking air hose or fitting
A large leak can use air as quickly as the pump produces it. Look at the hose, quick couplers, drain valve, regulator, pressure gauge ports, and threaded fittings.
Apply soapy water to each connection. Bubbles that grow show a leak. Tighten a loose fitting carefully, but do not force brass or plastic parts. Replace damaged hoses and worn O-rings.
A clogged intake air filter
The intake filter keeps dust from entering the pump. When the filter becomes dirty, the pump cannot draw enough air. The compressor may run for a long time and produce little pressure.
Remove the filter according to the manual. Replace a paper or foam filter that is dirty or damaged. Do not run the compressor without its filter in a dusty area, because dirt can quickly wear the cylinder and piston.
A faulty tank check valve
The check valve allows compressed air to enter the tank but stops tank air from flowing back into the pump. If it sticks open, the compressor may leak air through the pump head or unloader tube.
A common clue is a strong hiss from the small tube near the pressure switch after the motor stops. A short release is normal. A constant hiss suggests that the check valve may not be sealing.
A stuck unloader valve
The unloader valve releases pressure from the pump discharge tube when the compressor stops. This helps the motor start again without fighting trapped pressure.
If the unloader valve stays open while the motor runs, the compressor may continuously lose air. Inspect the small tube and valve for dirt, loose connections, or mechanical damage.
A damaged pressure switch
The pressure switch turns the motor on and off at set pressure levels. A faulty switch may stop the motor too early or fail to send power to it.
Some pressure switches have adjustable cut-in and cut-out settings. Do not change these settings without checking the manual. Incorrect adjustment can make the motor overheat or push the tank beyond its safe working pressure.
A worn pump or piston seal
A pump with worn piston rings, a damaged cylinder, or a leaking head gasket may run normally but fail to build pressure. This fault is more likely on an older compressor that has seen heavy use.
Signs include:
• Very slow filling
• Excessive oil in the air line
• Air blowing from the intake filter
• Oil mixed with moisture at the drain
• Unusual knocking or tapping sounds
• A pump that becomes much hotter than normal
Pump repairs often require special tools and accurate assembly. A rebuild kit may solve the problem, but compare the repair cost with the price of a replacement compressor.
A broken reed or valve plate
Many small reciprocating compressors use reed valves or valve plates to control air movement. A broken reed can allow air to flow backward instead of into the tank.
The motor may sound normal, but the compressor will not reach its rated pressure. This repair usually requires removing the cylinder head, so follow the manufacturer’s torque and gasket instructions.
A weak motor or electrical problem
The pump cannot compress air properly if the motor runs slowly. Low voltage, a failing start capacitor, a damaged extension cord, or a worn motor can reduce speed and pumping power.
Avoid long or undersized extension cords. They can cause voltage drop and motor overheating. For larger units, use the correct circuit size and wiring recommended by the manufacturer.

How to Diagnose the Problem Step by Step
A careful test is better than replacing parts at random. These steps work for many portable and stationary reciprocating compressors, but the manual for your model should always take priority.
1. Check the pressure gauges
Turn the compressor on and watch the tank gauge. Note whether pressure rises at all.
Compare the tank gauge with a known accurate gauge if possible. A defective gauge may show low pressure even when the tank is pressurized. Never assume the gauge is accurate just because it moves.
2. Listen for leaks
With the compressor running, listen around the tank, fittings, drain valve, regulator, hose, and pump head. A hiss near the pump discharge line often points to a check valve or unloader problem.
When the compressor stops, listen again. A brief hiss from the unloader is normal. A steady leak from the same area is not.
3. Test with the outlet closed
Close the tank outlet valve and run the compressor for a short test. This removes the hose and tool from the system.
If the tank fills with the outlet closed, the leak is probably in the hose, coupler, regulator, or air tool. If the tank still will not fill, focus on the pump, check valve, pressure switch, intake filter, and motor.
4. Inspect the intake filter
Remove and inspect the intake filter. Hold it toward a light if the design allows it. If you cannot see light through a paper element, replace it.
Never wash a filter unless the manual says it is washable. Moisture can damage some filter materials and may allow dirt into the pump.
5. Check the tank drain valve
A drain valve that is partly open can prevent pressure from building. Turn it fully closed, then test it with soapy water.
If bubbles form around the valve stem or outlet, replace the valve. Do not rely on excessive force to stop a leak because that can damage the tank fitting.
6. Inspect the check valve and unloader line
Disconnect power and drain the tank completely. Inspect the tube between the pump and tank, the check valve, and the small unloader tube connected to the pressure switch.
Look for loose nuts, cracked tubing, blocked passages, and damaged seals. Replace parts with the correct model or approved equivalent. A check valve that looks clean can still fail internally.
7. Check for air blowing from the intake
With the compressor running, carefully check for air movement at the intake filter without placing fingers near moving parts. Air pushing outward from the intake often means a damaged intake valve, reed valve, head gasket, or piston ring.
This test is a useful clue, but it does not identify the exact failed part. Internal inspection may be needed.
8. Evaluate motor speed and heat
The motor should run at a steady speed. A hum, slow start, repeated breaker trip, or hot electrical smell points to an electrical or motor problem.
Stop the test if the motor becomes excessively hot. Repeated overheating can damage the windings and turn a small fault into a costly repair.
9. Perform a pressure-hold test
Fill the tank to its normal shutoff pressure, then switch the compressor off. Record the pressure and wait for 10 to 15 minutes.
A small drop may occur, but a fast pressure loss indicates a leak. Spray soapy water over the tank fittings and connections to locate the source. Do not use this test if the tank shows corrosion or structural damage.
Quick Fixes You Can Try
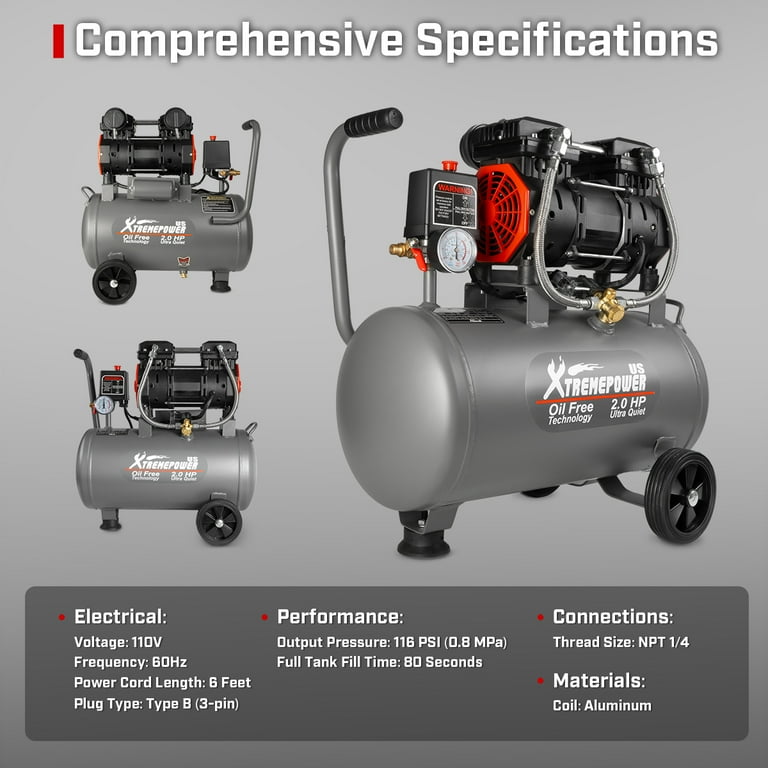
Some causes of an air compressor won't fill tank problem are simple to correct.
• Close the tank drain valve fully.
• Replace a clogged intake filter.
• Tighten loose hose and fitting connections.
• Replace cracked air hoses and worn coupler seals.
• Clean or replace a blocked unloader tube.
• Use the correct power supply and avoid an unsuitable extension cord.
• Allow an overheated motor to cool before testing again.
• Replace a faulty check valve with the correct part.
• Confirm that the pressure switch is receiving power and operating correctly.
Use thread sealant only on tapered pipe threads. Keep sealant away from the first thread so pieces cannot enter the valve or regulator. Do not use sealant on compression fittings, O-rings, or flare fittings unless the manufacturer permits it.
One mistake I have seen often is tightening every fitting as hard as possible. That can crack a regulator body or strip soft threads. Tighten the part firmly, then use a leak test to confirm the repair.
When the Compressor Fills Slowly
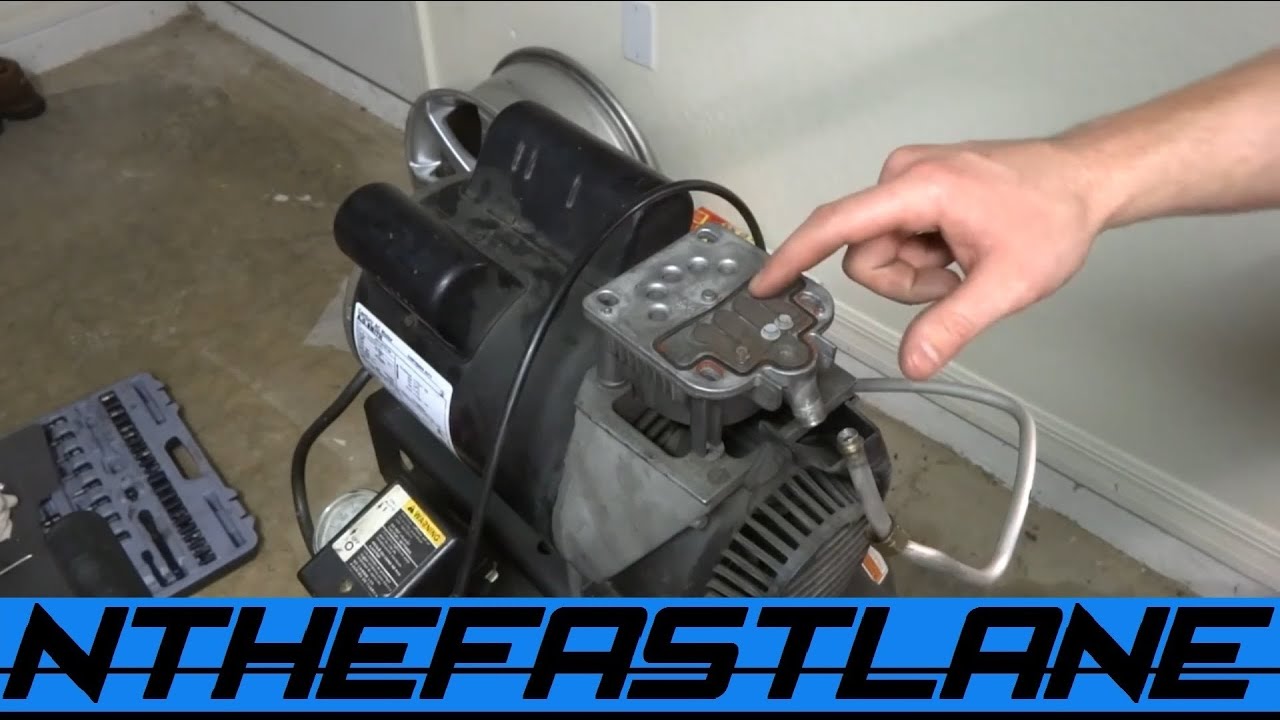
A slow-filling compressor may still reach its rated pressure, but it takes much longer than normal. This often signals restricted airflow or internal wear.
Start with easy causes:
- Clean or replace the intake filter.
- Check for leaks while the compressor runs.
- Confirm that the outlet valve and drain valve are closed.
- Check the supply voltage.
- Inspect the pump for loose bolts or a damaged gasket.
- Listen for unusual valve noise.
- Compare fill time with the specification in the manual.
Manufacturers usually list a recovery time or pump-up time. Test the machine under similar conditions. A compressor may fill more slowly in cold weather, at high altitude, or when the motor is connected to a long extension cord.
If the compressor takes twice as long as it used to and has no external leaks, internal wear becomes more likely. Worn rings and valves reduce the amount of air moved during each stroke.
How to Tell If the Check Valve Is Bad
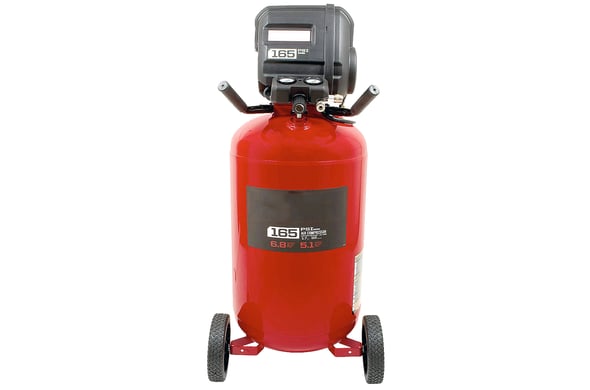
The tank check valve is a small part with a major job. It protects the tank from sending compressed air backward into the pump.
Possible signs of a failed check valve include:
• Continuous air leakage from the unloader tube after shutdown
• A motor that struggles to restart
• Pressure that falls quickly through the pump
• The compressor running but failing to build tank pressure
• A check valve that has dirt, rust, or damaged internal parts
To inspect it, disconnect power and drain all tank pressure. Remove the valve only if your manual supports this procedure. Clean minor dirt if allowed, but replace the valve if the spring, seat, or internal seal is damaged.
Do not operate the compressor with the check valve removed. The tank may discharge air through the pump, and the motor may face an unsafe starting load.

When to Repair or Replace the Compressor
Repair makes sense when the fault is a hose, filter, drain valve, check valve, gasket, or pressure switch. These parts are usually easier to replace and cost less than a new compressor.
Replacement may be more practical when:
• The tank has serious rust or structural damage.
• The motor and pump both show heavy wear.
• Parts are no longer available.
• The repair cost is close to the price of a new unit.
• The compressor has a history of overheating.
• The machine cannot meet your required airflow.
Do not judge a compressor by tank size alone. Check the delivered air, often listed as CFM at a stated PSI. A tool may need more airflow than the compressor can provide, even when the tank fills correctly.
A larger tank stores more air, but it does not make a weak pump stronger. It only gives the tool a longer reserve before the pressure drops.

Maintenance That Prevents Filling Problems
Regular care helps prevent an air compressor won't fill tank failure and can extend pump life.
Follow a simple routine:
• Drain moisture from the tank after use or as the manual directs.
• Check the tank, fittings, and hoses for corrosion or leaks.
• Clean or replace the intake filter.
• Check oil level on oil-lubricated pumps.
• Use the correct compressor oil, not automotive motor oil, unless the manual says otherwise.
• Inspect electrical cords, plugs, and switches.
• Keep cooling fins and ventilation openings clean.
• Do not exceed the compressor’s duty cycle.
• Store the unit in a dry, clean place.
Moisture forms when warm compressed air cools inside the tank. Draining it reduces internal corrosion. A neglected drain valve can become the starting point for a serious tank problem.
In my experience, the best maintenance habit is a quick leak check once a month. A few minutes with soapy water can find a small leak before the compressor runs for hours and overheats.

Frequently Asked Questions About an Air Compressor Won’t Fill Tank
Why is my air compressor running but not building pressure?
The most common causes are a clogged intake filter, leaking hose, faulty check valve, damaged reed valve, or worn piston rings. Close the outlet valve and test the compressor again to separate tool or hose leaks from pump problems.
Why does my compressor leak air from the pressure switch?
A short burst of air after shutdown is normal because the unloader releases trapped pump pressure. If air continues to hiss, the tank check valve may be leaking or the unloader valve may be stuck open.
Can a bad capacitor stop an air compressor from filling the tank?
Yes. A weak capacitor can make the motor hum, start slowly, overheat, or fail to reach full speed. Turn off the power and have the capacitor tested or replaced by a qualified technician.
Will a clogged air filter keep a compressor from filling?
Yes. A blocked filter restricts the air entering the pump, so the compressor may run but build pressure very slowly. Replace the filter if it is dirty, damaged, or difficult to clean safely.
How do I know if the compressor tank check valve is bad?
A constant hiss from the unloader tube after shutdown is a strong clue. A motor that struggles to restart or a tank that loses pressure through the pump also suggests a check valve problem.
Is it safe to use a compressor that will not reach shutoff pressure?
It is best not to use it until you identify the cause. Continuous operation can overheat the motor and pump, while a damaged tank or pressure control may create a serious safety risk.
Can low voltage cause an air compressor to fill slowly?
Yes. Low voltage can reduce motor speed and torque, especially with long or undersized extension cords. Use the power supply and wire size recommended for your compressor.
Conclusion
An air compressor won't fill tank problem usually comes from a restricted intake, air leak, failed check valve, unloader fault, weak motor, or worn pump valve. Start with safe, simple checks: drain the tank, inspect the filter, close the outlet, test for leaks, and watch the pressure gauges.
Do not ignore a compressor that runs continuously, overheats, or shows tank corrosion. A careful diagnosis can save money, protect the machine, and prevent injury. Use your compressor manual for part specifications and service limits, then share your repair experience or explore more compressor maintenance guides for the next step.