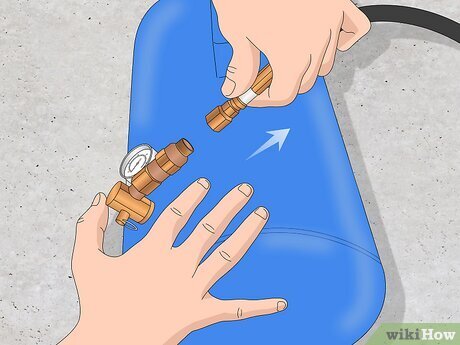
Air Compressor Won’t Build Pressure: Causes And Fixes
An air compressor won't build pressure when air leaks, valves fail, filters clog, or the pump cannot compress air.
An air compressor won't build pressure for many reasons, but the fault is often easier to find than it first seems. A careful check of the air path, intake system, pump, pressure switch, and check valve can reveal the problem without guesswork. This guide explains the most common causes, safe tests, repair options, and signs that you need professional service.
What It Means When an Air Compressor Won’t Build Pressure
An air compressor should draw air through its intake filter, compress it inside the pump, and send it into the storage tank. The pressure switch then turns the motor off when the tank reaches its preset limit.
If an air compressor won't build pressure, it may run without filling the tank, build pressure very slowly, or stop at a low pressure level. Each symptom points to a different part of the system.
Common symptoms include:
• The motor runs, but the tank pressure does not increase.
• The compressor reaches some pressure but cannot reach its rated maximum.
• The tank fills slowly and the pump runs much longer than usual.
• Pressure drops soon after the motor shuts off.
• Air escapes from the pressure switch, drain valve, hose, or fittings.
A small pressure loss can make a compressor seem weak. Think of it like trying to fill a bicycle tire with a hole in it. The pump may work, but the air never stays where it belongs.

Safety Before Troubleshooting an Air Compressor
Compressed air can cause serious injuries. Electrical parts can also shock you, and the pump head may become hot enough to burn skin.
Before inspecting or repairing the unit:
-
Turn off the compressor.
-
Unplug it or disconnect power at the breaker.
-
Drain the air tank completely.
-
Wait for the pump to cool.
-
Wear safety glasses and hearing protection.
-
Keep loose clothing, hair, and hands away from moving parts.
Never remove a pressure switch cover while power is connected. Do not weld, drill, or modify an air tank. Corrosion inside a tank can weaken the metal, and a damaged tank should be replaced rather than repaired.
The tank drain valve deserves special attention. Open it slowly and point the outlet away from people. Water and rust may come out under pressure.

Common Reasons an Air Compressor Won’t Build Pressure
1. Air leaks in the system
An air leak is one of the most common causes. Leaks can occur at:
• Hose connections
• Pipe joints
• Pressure gauges
• Safety relief valves
• Drain valves
• Tank fittings
• The pressure switch unloader tube
To find a leak, fill the tank and shut off the compressor. Apply soapy water to each connection. Bubbles will grow at the leak point.
Do not use your hands to search for a high-pressure leak. Air can enter small cuts in the skin and cause serious injury. Use your eyes and soapy water instead.
2. A dirty or blocked intake filter
The pump needs a steady flow of clean air. A clogged intake filter restricts that flow and reduces the amount of air the pump can compress.
Remove the filter and inspect it under a bright light. Replace a paper filter if it looks dark, oily, or blocked. Some foam filters can be washed, but follow the compressor manufacturer’s instructions before cleaning them.
Running a compressor without its filter is not a good long-term fix. Dirt can enter the cylinder and damage the piston, rings, and cylinder wall.
3. A worn pump piston ring
The piston ring seals the gap between the piston and cylinder. When the ring wears, compressed air can slip past the piston and return to the crankcase.
This problem often causes slow tank filling, high oil use, or air movement at the crankcase breather. The compressor may still run smoothly, which can make the fault hard to notice.
A worn ring usually requires pump disassembly. If you are not familiar with compressor repair, compare the cost of a rebuild with the price of a replacement pump or new compressor.
4. A damaged reed or valve plate
Many reciprocating compressors use small reed valves to control air movement. These valves must open and close at the right time.
A broken, bent, carbon-covered, or cracked valve can prevent the pump from moving air into the tank. The motor may sound normal, but the tank pressure remains low.
Valve problems may also cause air to move backward through the intake filter. If you feel strong pulses of air coming out of the intake while the compressor runs, inspect the pump valves.
5. A faulty tank check valve
The check valve allows air to enter the tank but stops tank pressure from flowing back into the pump. If it leaks, the compressor may lose pressure through the pump head or unloader line.
You may hear a steady hiss after the motor stops. A short hiss from the unloader tube is normal on many compressors, but continuous leakage is not.
Remove and clean the check valve only after fully draining the tank and disconnecting power. Replace the valve if the seat, spring, or internal parts are damaged.
6. A defective pressure switch
The pressure switch controls when the motor starts and stops. It may also control the unloader valve.
If the switch is misadjusted or defective, it may stop the motor too early. It may also fail to start the motor when tank pressure falls.
Do not change the cut-in or cut-out settings unless the manufacturer provides safe adjustment instructions. The tank, motor, and safety valve must work within their rated pressure limits.
7. A slipping belt or weak motor
Belt-driven compressors can lose pump speed when the belt is loose, cracked, glazed, or oily. A direct-drive compressor may have a motor, capacitor, or electrical supply problem.
Signs of a belt problem include:
• Squealing during startup
• Black belt dust near the pulley
• A belt that looks loose
• A pump that turns slowly
• A motor that runs hot
A weak extension cord can also reduce motor voltage. This may cause poor performance and overheating. Use the correct wire size and avoid long, lightweight extension cords.
8. Excessive heat or poor lubrication
Heat makes a compressor work harder. Poor ventilation, low oil, dirty cooling fins, or incorrect oil can reduce performance.
Check the oil level on oil-lubricated models. Use only the oil type specified in the manual. Never assume automotive motor oil is suitable.
Oil-free compressors have different service needs. They may use special piston cups or rings that wear over time. Adding oil to an oil-free pump can cause damage.
9. A restricted discharge line
A blocked discharge tube can limit airflow from the pump to the tank. Carbon buildup, a damaged tube, or a blocked fitting may be responsible.
Inspect the tube between the pump head and tank check valve. Look for crushed sections, loose fittings, and signs of overheating.
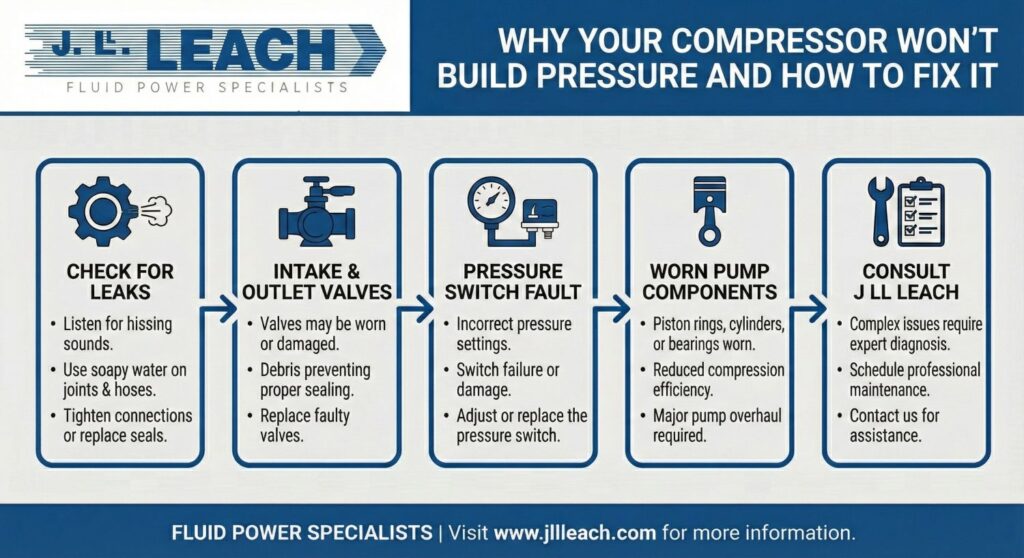
How to Diagnose an Air Compressor That Won’t Build Pressure
Use a simple process. Start with external checks before opening the pump.
Step 1: Check the pressure gauge
Make sure the gauge is working. A damaged gauge may show low pressure even when the tank has pressure.
Compare the built-in gauge with a known accurate test gauge if possible. Never rely on a gauge that is cracked, stuck, or fogged with moisture.
Step 2: Listen for escaping air
Fill the tank as much as the compressor allows, then switch it off. Listen closely around the tank, fittings, drain valve, and pressure switch.
A quiet room helps. Some leaks are too small to hear, so use soapy water.
Step 3: Test the drain valve
Close the drain valve firmly. If air escapes from the valve, clean its threads and seat. Replace the valve if it still leaks.
A drain valve that remains partly open can make an air compressor won't build pressure problem appear to be a pump failure.
Step 4: Inspect the intake filter
Remove and inspect the filter. Replace it if dirty or damaged.
Never operate the compressor for long without a filter. A brief test may help confirm an airflow issue, but exposed operation can pull grit into the pump.
Step 5: Observe the pressure behavior
Watch how the pressure changes:
• No pressure increase usually suggests a major leak, broken valve, or severe pump wear.
• Slow pressure increase often points to a dirty filter, worn ring, belt problem, or small leak.
• Pressure that stops at the same low point may indicate a pressure switch, valve, or motor problem.
• Pressure that falls after shutdown usually indicates a leak or check valve issue.
Step 6: Check the unloader valve
After the motor stops, the unloader valve may release trapped air from the pump discharge line. This should usually last only a few seconds.
If it continues to hiss, the check valve may not be sealing. If the motor struggles to restart, the unloader may also be faulty.
Step 7: Check for intake pulses
Place a piece of paper near the intake without blocking it. Strong reverse pulses may indicate a damaged intake valve or valve plate.
This test is useful, but it does not replace pump inspection. Some compressor designs behave differently, so confirm the result with the service manual.

Easy Repairs You Can Try
Some repairs are suitable for a careful homeowner or workshop user.
• Replace a clogged intake filter.
• Tighten loose fittings with the correct thread sealant.
• Replace a leaking drain valve.
• Replace a damaged air hose or quick coupler.
• Clean or replace the tank check valve.
• Adjust or replace a loose drive belt.
• Correct the oil level using the specified compressor oil.
• Improve airflow around the compressor.
Use thread sealant only on threaded connections. Do not put sealant on the first thread, where it could enter the air system and block a valve.
Do not overtighten brass fittings. Brass can crack, and a cracked fitting may leak more than the original loose one.
When to Replace Parts or Call a Professional
Pump rebuilds can involve removing the cylinder head, checking valve plates, measuring cylinder wear, and replacing piston rings. These jobs require clean work, correct torque, and sometimes special tools.
Call a qualified technician if:
• The tank shows heavy rust, dents, or welding repairs.
• The motor trips the breaker repeatedly.
• The compressor overheats quickly.
• The pump has loud knocking or grinding sounds.
• The pressure relief valve opens during normal use.
• You find metal particles in the oil.
• The pump needs internal repair.
A common mistake is replacing the pressure switch before checking for leaks. I have seen users spend money on switches when a loose drain valve was the real cause. Start with the simple checks, then move toward internal parts.

How to Prevent Future Pressure Problems
Regular care can extend compressor life and reduce downtime.
Follow a basic maintenance routine:
-
Drain moisture from the tank after use, especially in humid areas.
-
Inspect hoses and couplers every few weeks.
-
Clean or replace the intake filter as recommended.
-
Check oil level before operation on lubricated models.
-
Keep cooling fins and vents free of dust.
-
Inspect belts for wear and correct tension.
-
Test the safety relief valve according to the manual.
-
Check for leaks at least once a month.
Moisture is more than a nuisance. Water can cause internal tank corrosion, damage air tools, and contaminate paint or pneumatic equipment. An automatic drain or water separator may help in busy workshops.
Do not exceed the compressor’s duty cycle. A small home compressor may need rest periods, while a commercial unit may be designed for continuous use. The manual is the best guide because duty ratings vary by model.

Air Compressor Won’t Build Pressure: Cost and Repair Limits
The repair cost depends on the failed part. A filter, coupler, drain valve, or belt is usually inexpensive. A piston ring, cylinder, motor, or complete pump can cost much more.
Before ordering parts, record:
• The compressor brand and model
• Tank size
• Maximum rated pressure
• Motor horsepower
• Pump type
• Part number from the manual
Avoid choosing parts by appearance alone. Two check valves may look similar but have different thread sizes, pressure ratings, or flow directions.
If an old compressor has a badly rusted tank and a worn pump, replacement is often safer and more economical. The tank is the pressure vessel, so its condition matters more than the paint or motor appearance.

Frequently Asked Questions About an Air Compressor Won’t Build Pressure
Why is my air compressor running but not building pressure?
The most likely causes are an air leak, blocked intake filter, damaged pump valve, worn piston ring, or faulty check valve. Start by checking for leaks with soapy water and inspecting the intake filter.
Why does my compressor stop building pressure at 40 PSI?
A compressor that stops at a fixed low pressure may have a damaged valve plate, worn piston ring, weak motor, slipping belt, or pressure switch problem. Check the pressure behavior and pump intake before changing the switch.
Can a bad check valve cause an air compressor to lose pressure?
Yes. A faulty check valve can allow tank air to flow backward into the pump. A continuous hiss from the unloader area after shutdown is a common warning sign.
How do I find an air leak in my compressor?
Fill the tank, turn off the compressor, and apply soapy water to fittings, valves, hose ends, and the drain valve. Growing bubbles show the leak location; never use your hand to search for escaping high-pressure air.
Is it safe to run an air compressor without an air filter?
Only a brief diagnostic check may be appropriate, and even then you must follow the manufacturer’s guidance. Long-term operation without a filter can pull dust into the cylinder and damage the piston, rings, and valves.
How often should I drain an air compressor tank?
Drain the tank after use or at least daily in humid conditions. Removing water helps reduce internal corrosion and protects connected air tools.
Should I replace or repair a compressor that will not build pressure?
Repair a compressor when the tank is sound and the problem is a simple part such as a filter, valve, belt, or fitting. Replacement may make more sense when the tank is badly corroded or the motor and pump both need major work.
Conclusion
An air compressor won't build pressure when air escapes, airflow is restricted, the pump valves fail, or the motor cannot drive the pump correctly. Start with safe external checks: inspect the gauge, listen for leaks, test with soapy water, check the filter, and watch how pressure changes.
Avoid changing parts at random. A careful diagnosis can save money and prevent damage, while a damaged tank or unsafe electrical fault requires professional attention. Work through the checks in order, follow the manufacturer’s manual, and share your repair experience or questions in the comments.