Air Compressor Regulator Not Working: Causes And Fixes
An air compressor regulator may not work because of blocked passages, worn seals, wrong settings, or low tank pressure.
An air compressor regulator not working can stop tools, cause weak airflow, or send pressure far above the setting you need. This guide explains how regulators work, how to test one safely, and when cleaning, repair, or replacement is the best choice.
What an Air Compressor Regulator Does
An air compressor regulator controls the air pressure that leaves the tank and reaches your tool. The tank may hold air at 125 PSI, while a nail gun, spray gun, or blow gun may need much less.
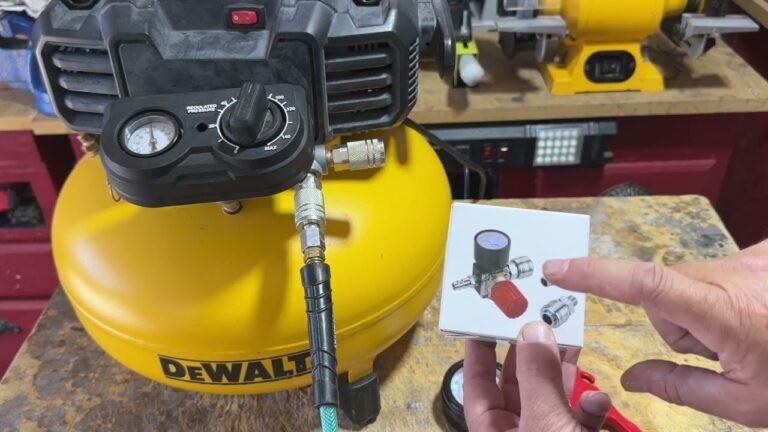
The regulator acts like a valve between the tank and the air hose. You turn the adjustment knob, and the regulator changes the outlet pressure shown on the gauge.
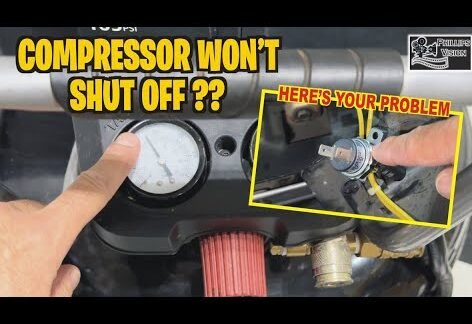
A regulator does not usually control the pressure inside the storage tank. The compressor pressure switch handles that job. This difference helps explain many cases where an air compressor regulator not working seems to be the problem.
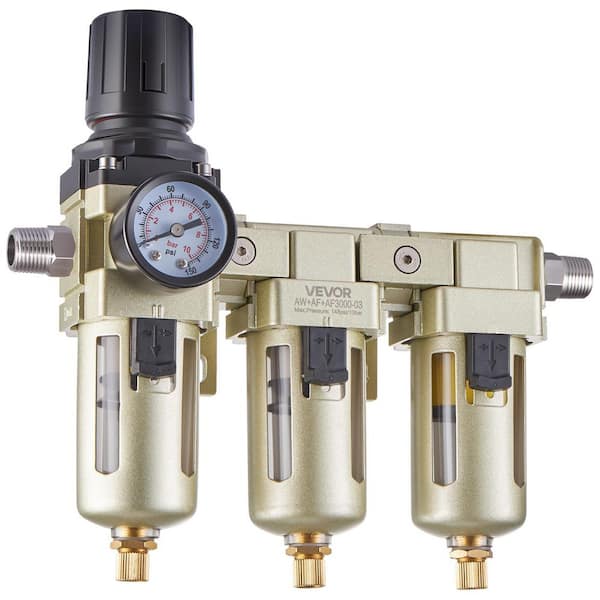
Most regulator assemblies include:
• An adjustment knob or screw
• A regulator valve
• A diaphragm or piston
• Internal springs
• Seals and O-rings
• An outlet pressure gauge
• An inlet and outlet port
If any of these parts becomes clogged, damaged, or incorrectly installed, the regulator may stay at one pressure, drop pressure under load, leak air, or fail to show a reading.

Common Signs of an Air Compressor Regulator Not Working
The symptoms often tell you where to start. Watch what the gauge does when the compressor is running, when air is flowing, and when no tool is connected.
Common signs include:
• The outlet gauge stays at zero even though the tank has air.
• The pressure does not change when you turn the adjustment knob.
• The outlet pressure rises close to tank pressure.
• The pressure drops quickly when you use an air tool.
• The gauge needle shakes or sticks.
• Air leaks around the knob, fittings, or regulator body.
• The pressure changes very slowly.
• The compressor cycles more often than normal.
• The air tool performs poorly even when the tank gauge looks normal.
A regulator that shows pressure with no air flowing may still fail under load. This is a key point. Some worn regulators can hold static pressure but cannot supply enough air when a tool starts.
For example, a spray gun may work for a few seconds, then lose pressure. That may indicate a restricted regulator, a clogged filter, a small hose, or a compressor with too little air delivery.

Why Is My Air Compressor Regulator Not Working?
Several problems can cause an air compressor regulator not working. Start with simple causes before opening the regulator.
The adjustment knob is locked
Some regulators have a locking knob. You must pull the knob up before changing the setting. Other models use a lock ring or set screw.
If the knob turns but the pressure does not change, check the manual for the correct adjustment method. Do not force the knob with pliers. A broken adjustment stem can turn a simple issue into a full replacement.
The regulator is set too low
A regulator set to zero or near zero may seem defective. Turn on the compressor and allow the tank to reach normal pressure. Then unlock the knob and turn it slowly clockwise.
Many regulators only adjust pressure while air is flowing. Open the tool valve for a moment or use a controlled air release while making small adjustments.
Dirt is blocking the valve
Rust flakes, pipe sealant, dust, and compressor oil can enter the regulator. These particles may stop the valve from moving freely.
This is common in older compressors, especially when the tank has not been drained often. Moisture inside the tank can carry rust into the air line.
The diaphragm or seal is damaged
A diaphragm senses outlet pressure and helps the regulator maintain a steady flow. If it cracks, stiffens, or tears, the regulator may leak or fail to control pressure.
A damaged seal may also allow outlet pressure to rise when no air is being used. This condition is called creep. It can be unsafe for tools and air systems that need a set pressure.
The gauge is faulty
The regulator may work while the gauge gives a false reading. A stuck needle, damaged Bourdon tube, or blocked gauge port can make the system appear broken.
Compare the outlet gauge with a known accurate test gauge. Do not trust a pressure gauge that has been dropped or exposed to pressure above its rated limit.
The ports are installed backward
Many regulators have an arrow that shows the direction of airflow. If the regulator is installed backward, it may not control pressure correctly.
Look for markings such as IN, OUT, or an arrow on the body. The arrow should point toward the hose and air tool.
The compressor has low tank pressure
A regulator cannot provide stable outlet pressure if the tank pressure is below the selected outlet setting. For example, a 90 PSI outlet setting cannot remain stable when the tank has only 75 PSI.
Check the tank gauge first. The tank must have enough pressure above the regulator setting to maintain flow.
The air filter is blocked
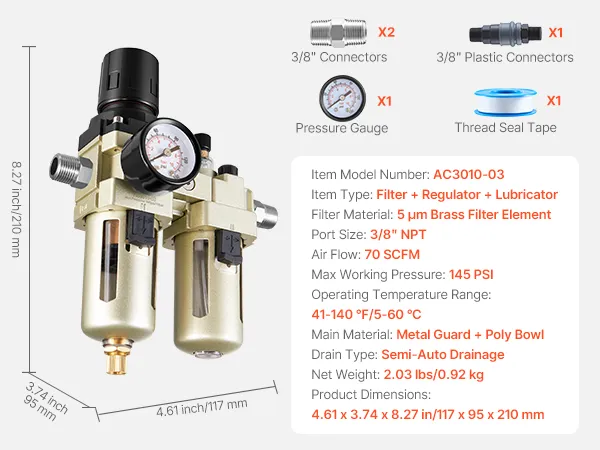
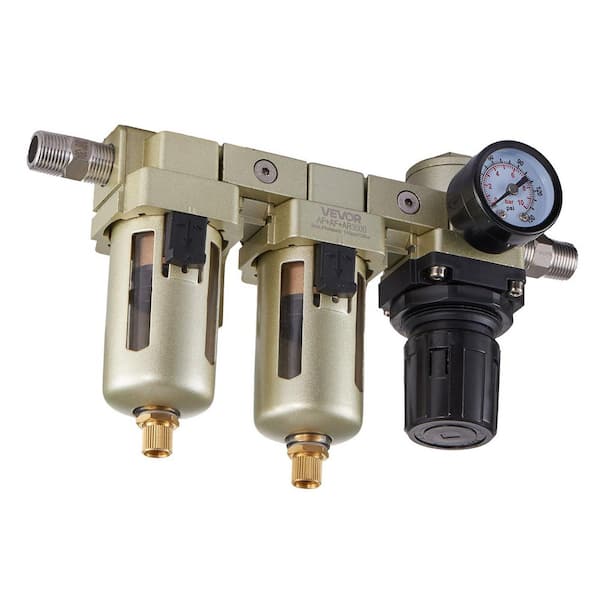
Some regulator assemblies include a filter or water separator. A blocked filter element can reduce airflow and mimic an air compressor regulator not working.
Drain the separator bowl and inspect the filter. Replace a dirty filter rather than washing a disposable element.
The air demand is too high
A small compressor may not keep up with a high-demand tool. A grinder, impact wrench, or spray gun can use more air than the compressor produces.
In this case, the regulator may be working correctly. The pressure falls because the compressor’s cubic feet per minute, or CFM, is lower than the tool’s demand.

How to Test an Air Compressor Regulator Safely
Work slowly and protect your eyes and hands. Compressed air can move debris at high speed, and pressurized parts can release energy without warning.
Before testing:
-
Turn off the compressor.
-
Disconnect the power supply.
-
Close the tank drain.
-
Release pressure from the hose.
-
Check the pressure ratings on the tank, hose, fittings, regulator, and tool.
-
Wear safety glasses.
Never remove a regulator from a pressurized system. Always drain pressure before loosening a fitting or opening a regulator body.
Use this simple test process:
-
Start the compressor and allow the tank to reach its normal cut-out pressure.
-
Read the tank gauge.
-
Unlock the regulator knob.
-
Turn the knob counterclockwise to reduce pressure.
-
Turn the knob clockwise in small steps to increase pressure.
-
Watch the outlet gauge while air flows through a blow gun or another safe tool.
-
Release the air and observe whether the pressure returns to the selected setting.
-
Check for leaks around the body, fittings, gauge, and knob.
A working regulator should adjust smoothly and hold a reasonably steady outlet pressure. Small changes are normal, but large pressure swings, creep, or no response point to a fault.
Do not test by placing your finger over an air leak. Use soapy water on fittings and watch for bubbles. Keep the solution away from electrical parts and wipe the area dry after testing.

Step-by-Step Fixes for an Air Compressor Regulator Not Working
Check the pressure settings
Confirm that the compressor tank has enough pressure. Then set the regulator below the tank pressure.
If the tool requires 90 PSI, try setting the regulator to about 95 PSI while the tool is running. The exact setting depends on the tool maker’s instructions.
Inspect the air direction
Find the airflow arrow on the regulator. If the arrow points toward the compressor instead of the tool, shut down the system and reinstall the unit correctly.
Use the correct thread seal method for your fitting type. Avoid putting thread tape over the first thread, because loose tape can enter the regulator and cause blockage.
Clean the filter and water separator
Drain the bowl if the unit has one. Remove the filter only after releasing all pressure.
Replace cracked bowls, damaged seals, and dirty filter elements. Never use a damaged clear bowl because it may fail under pressure.
Clean accessible passages
If the manufacturer allows cleaning, remove the regulator from the system and release all pressure. Use clean, dry air and a suitable nonflammable cleaner approved for the regulator material.
Do not scrape small valve seats with a sharp tool. A tiny scratch can prevent the valve from sealing.
Inspect the diaphragm
Look for cuts, stiff rubber, distortion, or signs of oil damage. Replace the diaphragm with the correct kit if the manufacturer supports service.
Regulator repair kits are useful when the body is sound and replacement parts are available. A full replacement is often better when the regulator has heavy rust, damaged threads, or a broken adjustment stem.
Test for pressure creep
Set the regulator to a moderate pressure. Close the tool valve and watch the outlet gauge.
If the pressure slowly rises without air use, the regulator seat may be dirty or worn. Clean the valve if approved by the manufacturer. Replace the regulator if the creep continues.
Check the gauge
Remove the gauge only after the system is fully depressurized. Compare it with a reliable gauge or install a new gauge with the correct pressure range and thread size.
A gauge rated much higher than the working pressure may be hard to read. A gauge rated too low may be dangerous.
When to Replace the Regulator
Repair is not always the safest or most cost-effective option. Replace the regulator when:
• The body is cracked or badly corroded.
• The adjustment stem is bent or stripped.
• The regulator leaks from a nonserviceable joint.
• The pressure keeps creeping after cleaning.
• The gauge is damaged and cannot be replaced.
• The correct repair kit is unavailable.
• The regulator has been exposed to a pressure above its rating.
• The outlet pressure is unstable under normal tool use.
Choose a regulator based on more than thread size. Check the maximum inlet pressure, outlet pressure range, airflow capacity, port size, temperature range, and compatibility with oil or moisture.
A regulator rated for 1/4-inch ports may restrict a high-flow tool. For demanding tools, compare the regulator’s rated SCFM or CFM with the tool’s air requirement.
Do not select a regulator only because it looks similar to the old one. The wrong pressure range or flow rating can create the same symptoms as an air compressor regulator not working.
How to Prevent Regulator Problems
Good maintenance can prevent many regulator failures. Moisture and dirt are the main enemies of small air-control parts.
Use these habits:
• Drain the compressor tank after use, especially in humid weather.
• Keep the air intake filter clean.
• Use a water separator when the air line produces moisture.
• Install an air filter before sensitive tools.
• Keep hose ends capped when stored.
• Avoid excessive thread sealant.
• Set pressure with air flowing when the regulator requires it.
• Do not exceed the regulator’s maximum inlet pressure.
• Inspect hoses and fittings for damage.
• Check for air leaks every few months.
• Replace rusty or contaminated fittings.
Tank drainage matters because compressed air creates condensation. In a garage, workshop, or outdoor shed, that moisture can collect quickly. A small amount of water may not seem serious, but repeated exposure can corrode the tank and carry rust into the regulator.
A clean, dry air system is easier on regulators, pneumatic tools, paint equipment, and seals.

Common Mistakes to Avoid
One common mistake is adjusting the regulator while the compressor is off and assuming the setting is wrong. Some models need airflow before the valve responds.
Another mistake is replacing the gauge first without testing the regulator. A gauge may be faulty, but a blocked passage or damaged diaphragm can create the same symptom.
Avoid using penetrating oil inside the regulator unless the manufacturer specifically approves it. Oil can damage certain seals and contaminate tools, especially spray equipment.
Do not bypass the regulator to “get more power.” Direct tank pressure can damage a tool, burst a hose, or create a serious safety hazard.
In repair work, I have found that the simplest cause is often missed: the knob is locked, the filter is full of debris, or the airflow arrow points the wrong way. Check those items before buying parts.

Understanding Pressure, Flow, and Tool Performance
Pressure and airflow are related, but they are not the same. PSI describes pressure. CFM describes how much air moves over time.
A tool may need 90 PSI but also require 12 CFM. A small compressor may reach 125 PSI in the tank but provide only 4 CFM at working pressure. The tool will then lose power even if the regulator is healthy.
A long, narrow hose can also cause pressure loss. Quick-connect fittings, clogged filters, and small regulator ports add more restriction.
Use this basic comparison:
• Tank pressure: The air stored in the compressor.
• Regulated pressure: The pressure sent to the tool.
• Dynamic pressure: The pressure measured while air is flowing.
• CFM: The volume of air the compressor or tool uses.
When diagnosing an air compressor regulator not working, measure pressure while the tool operates. Static pressure alone does not tell the whole story.
Frequently Asked Questions About Air Compressor Regulator Not Working
Why does my air compressor regulator stay at zero?
The tank may not have enough pressure, the knob may be set too low, or the regulator inlet may be blocked. Check the tank gauge, airflow direction, filter, and outlet gauge before replacing the regulator.
Why does the regulator pressure keep rising?
Pressure creep usually means the regulator valve seat is dirty, worn, or damaged. Clean the valve if the design allows it, then replace the regulator if the pressure still rises.
Can a bad gauge make the regulator seem broken?
Yes. A stuck or damaged gauge can show zero or an incorrect pressure even when the regulator works. Test the outlet with a known accurate gauge.
Should air come out of the regulator knob?
A small vent hole may release air during normal operation on some designs. Continuous leakage from the knob often indicates a damaged diaphragm, seal, or regulator body.
Why does pressure drop when I use my air tool?
Some pressure drop is normal, but a large drop may come from a clogged filter, undersized hose, restricted regulator, leak, or compressor with insufficient CFM. Check the tool’s air demand against the compressor’s output.
Can I repair an air compressor regulator myself?
You may be able to replace a diaphragm, seal, or filter if the manufacturer provides a repair kit. Always depressurize the system first and replace the regulator if the body, threads, or pressure-control parts are damaged.
How often should I drain my compressor tank?
Drain the tank after each use when practical, especially in humid areas. Regular draining reduces corrosion and helps keep rust and water out of the regulator and air tools.
Conclusion
An air compressor regulator not working can result from a locked knob, blocked filter, faulty gauge, low tank pressure, damaged diaphragm, incorrect installation, or excessive tool demand. Test the tank pressure, outlet pressure, airflow direction, gauge, and filter before buying a replacement.
Always release pressure before servicing the system, and use parts with the correct pressure and flow ratings. Start with the simple checks, follow the manufacturer’s instructions, and replace unsafe or badly damaged components. If this guide helped, share your symptoms or explore more air-tool maintenance resources for your workshop.