Grinder Guard Won’t Stay In Place: Quick Fixes & Safety
A loose clamp, damaged guard, wrong part, or vibration usually causes a grinder guard to move or fall out of place.
A grinder guard won’t stay in place when its clamp, screw, flange, or mounting collar cannot grip the tool body firmly. This is more than an annoying setup issue. A loose guard can expose the wheel, redirect sparks, and increase the risk of injury if the wheel breaks. This guide explains the common causes, safe checks, repair steps, and signs that mean you should replace the guard or grinder.

Why a grinder guard won’t stay in place
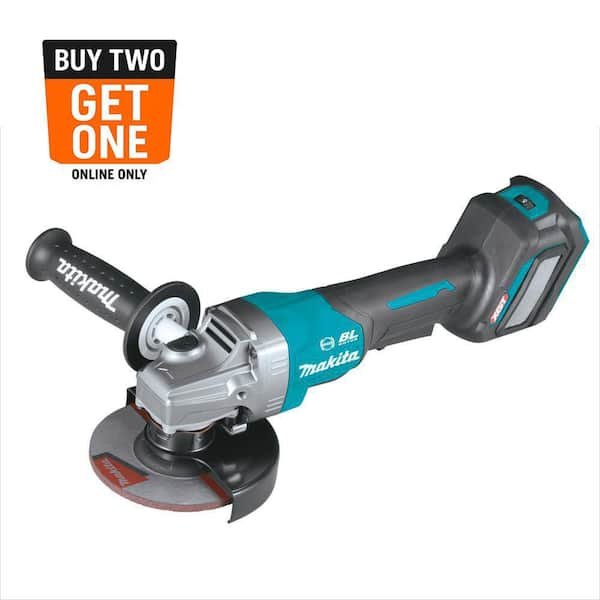
The guard on an angle grinder must lock tightly around the gear housing. It should not rotate freely, slide down, or shift when the tool vibrates. If a grinder guard won’t stay in place, the mounting system is often worn, dirty, damaged, or installed incorrectly.
Common causes include:
• A loose guard clamp or locking screw
• A stripped screw thread
• A bent or cracked guard
• A worn mounting collar
• Dirt, paint, or metal dust under the clamp
• An incorrect replacement guard
• A guard installed in the wrong direction
• Strong vibration from an unbalanced wheel
• A missing washer, bolt, or retaining part
• A damaged gear housing on the grinder
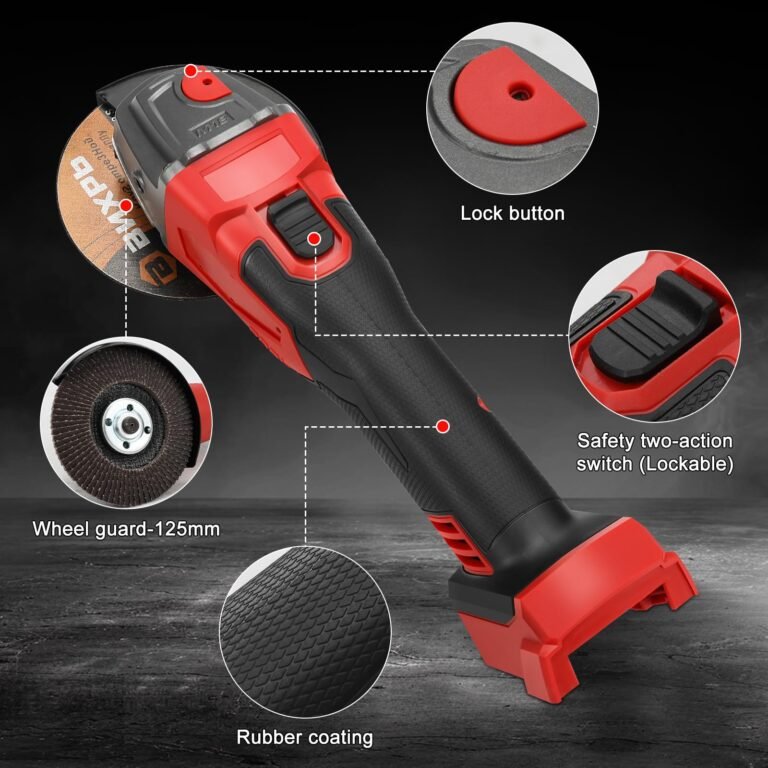
Most guards use one of two systems. Some have a clamp band with a screw. Others use a keyed collar, spring clip, or special locking flange. The repair depends on the design, so never force a guard that does not match the grinder.
A guard may feel tight while the tool is off but move during use. That often points to vibration, a worn clamp, or a wheel that is not seated correctly.
Safety steps before inspecting the guard
Before checking why a grinder guard won’t stay in place, make the tool safe. A grinder can coast for several seconds after the switch is turned off.
Follow these steps:
- Unplug the grinder from the outlet.
- Remove the battery if it is cordless.
- Wait until the wheel stops completely.
- Remove the grinding wheel or disc.
- Wear work gloves when handling sharp metal edges.
- Inspect the guard in a well-lit area.
- Read the grinder manual before removing any special parts.
Do not test the grinder with your hand near the guard. Do not hold the guard in place while the wheel spins. Do not use tape, wire, glue, or a hose clamp as a permanent repair.
A damaged guard can fail without warning. Safety agencies and power tool manufacturers consistently advise using the correct guard for the wheel type and keeping the guard installed during operation.
Check the guard clamp and locking screw
The clamp is the first place to inspect when a grinder guard won’t stay in place. The clamp should tighten around the grinder’s gear housing without slipping.
Look for these problems:
• The screw turns but never tightens
• The screw head is rounded
• The clamp has a visible gap
• The clamp is stretched or bent
• The guard moves with light hand pressure
• The clamp has deep rust or cracks
• The screw is too short or missing a washer
Clean the contact area with a dry cloth. Remove packed dust and metal particles. Avoid adding grease to the clamp because a slippery surface can make the guard move more easily.
Tighten the screw with the correct driver. Do not use excessive force. Over-tightening can strip the threads, deform the clamp, or crack the guard.
If the screw is stripped, replace the screw or the entire guard assembly with an approved part. Do not rely on a larger screw unless the manufacturer specifically allows it.
Inspect the mounting collar and gear housing
Some angle grinders use a collar or shoulder on the gear housing to hold the guard. If this collar is worn or damaged, a grinder guard won’t stay in place even when the screw seems tight.
Inspect the collar for:
• Deep grooves
• Flattened metal
• Cracks
• Missing sections
• Heavy rust
• A loose gear housing
• Signs that the guard has spun against the housing
The guard should sit evenly around the collar. If it tilts to one side, the mounting area may be bent or the guard may be the wrong size.
A loose gear housing is a serious problem. It can also cause unusual noise, wheel wobble, or excessive vibration. In that case, stop using the grinder and have it inspected by an approved repair center.
Do not grind, file, or reshape the housing to make a guard fit. Small changes can weaken the tool and affect the wheel’s position.
Make sure the guard is the correct type
A grinder guard won’t stay in place when the guard is not designed for that exact grinder model. Guards can look similar but use different collar sizes, locking systems, and wheel clearances.
Check the following:
• The grinder model number
• The guard diameter
• The wheel size rating
• The locking method
• The direction of guard installation
• The manufacturer’s replacement part number
• Compatibility with cutting or grinding wheels
A guard for a 4½-inch grinder may not fit a 5-inch grinder. A cutting wheel guard may also differ from a grinding wheel guard. Some tools require a special guard for wire wheels, flap discs, or abrasive cutting discs.
Never assume that a universal guard is safe just because it fits around the tool. It must hold firmly and provide the correct coverage for the wheel.
The manual usually shows the approved guard position. If the replacement part does not match the manual, return it and choose the correct model-specific part.
Check for vibration and wheel problems
Sometimes the guard is not the main problem. A grinder guard won’t stay in place because the tool vibrates too much during use.
Excess vibration can come from:
• A bent or cracked wheel
• A wheel mounted off-center
• A dirty spindle or flange
• The wrong wheel size
• A wheel that exceeds the grinder’s speed rating
• A damaged backing flange
• A loose spindle nut
• Worn bearings
• Excessive pressure during grinding
Remove the wheel and inspect it for cracks, chips, warping, or uneven wear. Never use a wheel that has been dropped or shows damage. Abrasive wheels can break at high speed, so inspect them before every use.
Clean the spindle and flanges. Make sure the wheel sits flat. Tighten the spindle nut according to the tool manual. Do not use extra washers or random spacers.
If the grinder still shakes without a wheel installed, the problem may be inside the tool. Stop using it and arrange professional service.

How to fix a grinder guard that keeps moving
Once the grinder is unplugged, you can perform a basic inspection and adjustment. These steps apply to many common angle grinders, but the manual for your model takes priority.
- Remove the wheel and battery or power connection.
- Loosen the guard clamp.
- Take the guard off the grinder.
- Clean the guard and mounting collar.
- Check the clamp, screw, washer, and threads.
- Look for cracks, bends, or stretched metal.
- Reinstall the guard in the correct direction.
- Position it between you and the wheel’s open side.
- Tighten the clamp firmly with the correct tool.
- Test the guard by applying moderate hand pressure.
- Refit a sound wheel and check that it spins freely.
- Run the grinder briefly in a safe position without touching material.
The guard should remain stable. It may be adjustable by design, but it should not drift during normal work.
If a grinder guard won’t stay in place after this process, replace the damaged part. A new guard is usually cheaper than an injury, damaged workpiece, or failed repair.
Mistakes that make the problem worse
Many users try quick fixes when a grinder guard won’t stay in place. These fixes may seem practical but can create a hidden hazard.
Avoid these common mistakes:
• Operating without the guard
• Taping the guard to the grinder
• Using wire or zip ties as a lock
• Drilling new holes in the guard
• Grinding away part of the clamp
• Using a screw with the wrong thread
• Installing a larger guard that blocks ventilation
• Reusing a cracked guard
• Tightening the clamp until it deforms
• Using a damaged or incorrect wheel
One mistake I often see in workshop repairs is tightening a loose guard without first checking the wheel. A badly seated wheel can cause vibration, and that vibration will loosen the guard again. The better approach is to inspect the guard, mounting area, wheel, flanges, and spindle as one system.
Another lesson is to avoid rushing the first test. A grinder can look stable for a few seconds and then shift when pressure is applied. Always test it in a controlled position with the correct personal protective equipment.
When you should replace the guard
Replace the guard if it has a crack, deep bend, missing section, or damaged clamp. Replace it if the locking screw cannot tighten or the guard continues to move after cleaning and adjustment.
You should also replace the guard when:
• The part number is unknown
• The guard does not match the grinder model
• The clamp has stretched
• The mounting holes are damaged
• The guard has been exposed to strong heat
• The guard has been struck by a broken wheel
• The guard blocks the wheel or spindle
• The guard cannot provide proper wheel coverage
Do not repair a cracked guard with epoxy or metal patches. The guard must withstand sparks, fragments, and vibration. A cosmetic repair does not restore its tested strength.
Use an original replacement part or a clearly approved equivalent. Keep the receipt and packaging until you confirm that the guard fits correctly and locks firmly.
Choosing and installing a replacement guard
When buying a replacement, identify the grinder by its model number rather than by appearance. The model label may be on the body, handle, battery compartment, or rating plate.
Check:
• Maximum wheel diameter
• Guard style
• Collar diameter
• Clamp design
• Cutting or grinding use
• Left-hand or right-hand setup
• Compatibility with the tool’s speed rating
After installation, confirm that the guard does not touch the wheel. Rotate the wheel by hand with the tool disconnected. It should move freely without rubbing.
Set the guard so sparks and debris move away from your face and body. The best position depends on the task and the tool design, but the guard should always shield the operator from the exposed part of the wheel.
Use safety glasses or a face shield, hearing protection, suitable gloves, sturdy clothing, and closed-toe footwear. Keep flammable material away from sparks and make sure bystanders stand clear.

How to prevent the guard from loosening
Prevention is easier than repeated adjustment. A grinder guard won’t stay in place for long if dust, vibration, and poor wheel mounting are ignored.
Use these habits:
• Inspect the guard before every use
• Clean the clamp and collar often
• Check the screw for tightness
• Use only approved wheels
• Store the grinder where the guard will not be hit
• Replace wheels that are cracked or dropped
• Avoid pushing too hard while grinding
• Keep the spindle and flanges clean
• Do not modify the guard
• Stop immediately if the guard shifts
A short pre-use check can prevent a serious failure. Confirm that the guard is secure, the wheel is sound, the power cord or battery is in good condition, and the switch works correctly.
If the tool suddenly vibrates, makes a new sound, smells hot, or moves the guard, release the trigger and disconnect the power. Find the cause before using it again.
Can you use an angle grinder without a guard?
Using an angle grinder without a guard is unsafe and may violate workplace safety rules. The guard helps protect you from wheel fragments, sparks, and accidental contact with the rotating wheel.
Even when a guard feels inconvenient, it should not be removed to reach a tight area. Choose a tool or accessory designed for that task instead.
Does the grinder guard need to be completely rigid?
The guard should be firmly locked but may be adjustable if the tool design allows rotation. It should not slide, droop, spin during grinding, or move when the tool touches material.
If a grinder guard won’t stay in place despite proper tightening, inspect the clamp and mounting collar. Replace the faulty part rather than forcing it tighter.
Frequently Asked Questions About Grinder Guard Won't Stay in Place
Why does my grinder guard keep rotating?
A loose clamp, worn collar, damaged screw, or incorrect guard can allow rotation. Clean the mounting area, tighten the correct fastener, and replace the guard if it still moves.
Can I use thread locker on the guard screw?
Only use thread locker if the grinder manufacturer permits it. Some products can make later repairs difficult, and thread locker cannot fix a stripped thread, cracked clamp, or wrong-size screw.
Is it safe to use a grinder if the guard is slightly loose?
No. A loose guard can move toward the wheel or leave the operator exposed to sparks and fragments. Disconnect the grinder and repair the mounting problem before use.
Why does my guard loosen only when I grind?
Vibration may be caused by a damaged wheel, poor wheel seating, dirty flanges, worn bearings, or heavy grinding pressure. Inspect the full tool and wheel system instead of tightening the guard repeatedly.
Can I replace an angle grinder guard with a universal guard?
A universal guard is safe only when it is approved for the grinder, wheel size, speed, and task. If it does not lock firmly and provide correct coverage, do not use it.
How tight should the grinder guard be?
It should be tight enough that moderate hand pressure cannot move it, but not so tight that the clamp, screw, or housing becomes damaged. Follow the tool manual for the correct adjustment method.
What should I do if the guard clamp is stripped?
Stop using the grinder and replace the stripped clamp, screw, or guard assembly with the correct part. Do not improvise with wire, tape, or a larger unapproved fastener.
Conclusion
A grinder guard won’t stay in place because of a loose clamp, worn mounting collar, damaged guard, wrong replacement part, or vibration from a wheel problem. Disconnect the tool, inspect every related part, and never use a temporary fix as a substitute for a proper repair.
The safest solution is often a manufacturer-approved guard and a careful wheel inspection. Check your grinder before the next job, replace any questionable parts, and share your own repair experience or questions in the comments.