Angle Grinder Won’t Turn On: Quick Fixes And Safety Checks
An angle grinder won’t turn on when power, switch, brushes, safety parts, or the motor circuit has failed.
An angle grinder is a simple tool with a demanding job. It spins an abrasive disc at very high speed, so even a small fault can stop it without warning. If your angle grinder won’t turn on, the cause may be as easy to fix as a tripped breaker or loose battery. It may also point to a failed switch, worn carbon brushes, or a damaged motor.
This guide explains how to find the fault in a safe order. You will learn what to check first, which repairs are reasonable, when to stop testing, and why some “quick fixes” can create a serious shock or fire risk.
Safety first when an angle grinder will not start
Before troubleshooting an angle grinder, remove the battery or unplug the power cord. Do not press the switch while the disc is installed unless the tool is fully assembled and you are carrying out a safe, controlled test.
An angle grinder can start suddenly if a stuck switch frees itself or a damaged cord makes contact again. A spinning disc can cause severe cuts, eye injuries, and kickback. Treat the tool as live until it is disconnected from every power source.
Follow these basic rules:
• Unplug corded models before removing the guard, disc, handle, or housing screws.
• Remove the battery from cordless models before inspecting the switch or motor.
• Wear safety glasses when testing a tool after repair.
• Keep the disc away from people, pets, loose clothing, and flammable items.
• Never bypass a trigger lock, paddle switch, thermal protector, or safety interlock.
• Do not test the tool with exposed wires touching the workbench.
• Stop if you smell burning insulation, see melted plastic, or find black marks near the motor.
A grinder that will not turn on is usually less dangerous than one that starts unexpectedly. Still, internal parts may hold sharp edges, stored spring force, or damaged insulation. If you are unsure, take the tool to an authorized repair center.

Source: youtube.com
Quick checks before opening the grinder
Many no-start problems are external. Check these simple causes before you remove a single screw. This step often saves time and prevents unnecessary damage to the housing.
Check the power outlet
Plug another tool or lamp into the same outlet. If that device also fails, reset the circuit breaker or ground-fault circuit interrupter.
A GFCI outlet may trip because of moisture, a damaged cord, or a fault in the grinder. Reset it only after the area is dry and the grinder is disconnected. If it trips again, do not keep resetting it.
Inspect the power cord
Look closely at the entire cord. Pay special attention to:
• Cuts, crushed sections, and exposed conductors
• Melted areas near the plug
• Loose strain relief at the tool body
• Fraying where the cord enters the handle
• A plug with bent or loose terminals
A cord can break inside its insulation while looking normal outside. If the grinder works only when the cord bends in one spot, stop using it. Do not wrap electrical tape around a serious cord failure and continue working.
Check the battery and charger
If a cordless angle grinder won’t turn on, the battery may be empty, too cold, too hot, or unable to communicate with the tool.
Place the battery on its correct charger. Look for the charger’s normal charging light. Clean dirty contacts with a dry cloth, then reinstall the battery firmly.
Do not use a battery that is swollen, cracked, leaking, hot, or badly damaged. Lithium-ion batteries can create a fire hazard when abused or shorted.
Check the spindle lock
A locked spindle does not normally stop the motor from starting, but a damaged lock can interfere with the gear head or create unusual resistance. Make sure the spindle lock button is fully released before pressing the switch.
Never hold the spindle lock while trying to start the grinder. Use the correct wrench to remove a disc, and follow the instructions in the tool manual.

Source: ifixit.com
Why your angle grinder won’t turn on
Once the basic checks are complete, the likely causes become easier to narrow down. A no-start fault usually falls into one of five groups: power supply, switch, brushes, motor, or electronic control.
1. The power supply has failed
A corded grinder needs a complete path from the outlet to the motor. A break at any point can leave the tool completely dead.
Possible causes include a bad outlet, tripped breaker, damaged plug, broken cord, loose terminal, or failed internal connection. Extension cords can also cause trouble, especially when they are too long, too light, or damaged.
Use an extension cord that matches the tool maker’s requirements. A voltage drop may cause poor performance, overheating, or failure to start. Never use a cord with exposed wires or loose connections.
2. The switch is worn or damaged
The switch controls current to the motor. Years of dust, sparks, vibration, and heavy use can wear its contacts.
A faulty switch may show several symptoms:
• Nothing happens when you press or slide it.
• The grinder works only if you press the switch in a certain place.
• The switch feels loose, gritty, or stuck.
• The tool starts and stops when you move the handle.
• You hear a faint click, but the motor stays silent.
Do not spray general-purpose oil into the switch. Oil can attract abrasive dust and may damage plastic parts. Replace the switch with the exact part listed for your model.
3. The carbon brushes are worn
Many corded angle grinders use carbon brushes to transfer power to the rotating armature. Brushes slowly wear down as they work.
When the brushes become too short, the motor may stop working. Other signs include intermittent starting, visible sparks through the vents, reduced power, or a burning smell.
Some models have brush caps that allow inspection from outside. Others require the housing to be opened. Replace brushes as a matched set when the manual calls for it, and inspect the brush holders for heat damage.
New brushes may need a short break-in period. Follow the manufacturer’s instructions rather than running the tool at full load right away.
4. The motor or armature has failed
A failed motor can make the angle grinder completely silent. It may also produce a sharp burning smell, smoke, heavy sparking, or a loud hum before stopping.
Common motor faults include:
• Burned armature windings
• Damaged commutator bars
• Open or shorted field coils
• Seized bearings
• Loose motor leads
• Metal dust trapped inside the motor
A motor repair often costs close to the price of a replacement grinder. For a professional model, repair may be worthwhile. For a low-cost tool, replacement is often the safer and more economical choice.
5. The electronic control has failed
Cordless grinders and some advanced corded models use electronic controls. These may include soft-start circuits, overload protection, speed controls, and battery communication systems.
If an angle grinder won’t turn on after overheating, the controller may have entered a protection state. Let the tool cool fully, remove the battery or unplug it, and try again only after checking the manual.
Do not bypass electronic protection. The circuit may protect the motor, battery, and user from excessive current.

Source: youtube.com
How to diagnose a corded angle grinder
A careful test can help identify the fault. You do not need to open the tool for the first part of the diagnosis.
Use this order:
- Test the outlet with another device.
- Inspect the plug and cord.
- Check whether the grinder has a reset button or overload protector.
- Confirm that the switch moves through its full range.
- Disconnect power and inspect the disc for a jam.
- Check external brush caps if the model provides them.
- Open the tool only if you understand basic electrical safety and the warranty allows it.
If you own a multimeter and know how to use one, you can test continuity after the grinder is disconnected from power. A continuity test may reveal an open cord or switch. It cannot prove that a component is safe under load.
Never measure resistance on a live tool. Do not rely on a meter reading alone. A switch can show continuity with no load and still fail when current flows through it.
Testing the switch
With the tool unplugged, identify the switch terminals from the wiring diagram or service manual. Set the multimeter to continuity or resistance mode. The switch should change state when activated.
If the switch remains open when it should close, or stays closed when it should open, it is defective. If the reading changes when you wiggle the switch, the contacts may be worn.
Take a photo before disconnecting wires. Connect each wire to the same terminal on the replacement switch. A wrong connection can damage the motor or create a shock hazard.
Inspecting carbon brushes
Disconnect the tool and remove the brush caps if present. The carbon block should move freely in its holder and maintain contact with the commutator.
Replace brushes if they are below the minimum length in the manual, chipped, cracked, or burned. Replace any damaged spring or brush holder as well.
Do not file a brush to make it fit. The brush shape and spring pressure matter. Poor contact can create heat and arcing.

Source: reddit.com
How to diagnose a cordless angle grinder
Cordless tools add more possible causes because the battery and electronics work as one system. Start with the battery, then move toward the tool.
Confirm the battery is compatible
Use the battery platform specified for the grinder. A battery that fits physically may still be wrong for the tool’s voltage, communication system, or current demand.
Check the battery label and the grinder manual. Do not modify terminals or use homemade adapters. A mismatch can damage the controller or create a battery safety risk.
Look for protection mode
Lithium-ion battery packs can shut down when they detect:
• Low voltage
• High temperature
• Excessive current
• A short circuit
Remove the battery for several minutes and let both the battery and grinder return to room temperature. Then charge the battery using the correct charger.
If the pack shows a fault light or refuses to charge, do not open it. Battery packs contain multiple cells and protective electronics. Have the pack inspected or replaced.
Clean the contacts
Dust and metal particles can block contact between the battery and tool. Remove the battery and wipe the contacts with a clean, dry cloth.
Do not scrape the terminals with a metal screwdriver. Do not spray cleaner into the battery slot. If the contacts are bent, burned, or loose, professional repair is the best option.
Check the electronic switch
Some cordless grinders use a paddle switch, lock-off button, or electronic trigger. If the lock button does not move fully, the grinder may stay off.
Keep the switch area free of packed dust. Never glue, tape, or wedge the safety button in the “on” position. That defeats a feature designed to prevent accidental starts.

Source: youtube.com
What the symptoms can tell you
The sound and behavior of the grinder can point toward the failed part. Always disconnect the tool before touching internal components.
The grinder is completely silent
A silent tool often has a power supply problem, failed switch, open connection, dead battery, or electronic fault. Start with the outlet, cord, battery, and switch.
The grinder clicks but does not spin
A click may come from a switch, relay, or electronic controller. A seized bearing, locked gear, failed motor, or low battery can also cause this symptom.
Do not keep pressing the switch. Repeated attempts can heat the wiring or controller.
The grinder hums
A hum suggests that current reaches the motor but the motor cannot start. A jammed disc, seized bearing, damaged armature, or failed start circuit may be involved.
Unplug the grinder and turn the spindle by hand only when the disc is removed or safely secured. It should not feel locked or grind harshly.
The grinder starts after tapping the housing
This often points to worn brushes, a loose connection, or a failing switch. Tapping the tool is not a repair. Continued use can cause arcing and damage the commutator.
The grinder stopped during heavy work
The overload or thermal protection may have activated. Let the tool cool, inspect the disc, and reduce the cutting load.
If the grinder repeatedly shuts down during normal work, it may have a blocked vent, worn motor, incorrect disc, weak battery, or internal electrical fault.

Source: graines-voltz.com
Common mistakes that make the problem worse
Troubleshooting can become unsafe when people rush. These mistakes appear often in home workshops.
• Repeatedly resetting a tripped GFCI without finding the cause
• Using a damaged extension cord
• Spraying lubricant into the switch
• Bypassing the lock-off or thermal protector
• Installing random carbon brushes
• Testing with the guard removed and the disc installed
• Connecting wires based on color alone
• Opening a lithium-ion battery pack
• Continuing to use a tool that smells burned
• Replacing a fuse with foil, wire, or a larger fuse
One useful workshop lesson is to change only one thing at a time. If you replace the switch, clean the motor, and install a new battery in one session, you may not know what fixed the problem. Worse, you may hide the original fault.
Take clear photos, label wires, and keep small parts in a tray. A five-minute record can prevent an hour of confusion during reassembly.

Source: youtube.com
When to repair and when to replace the grinder
A simple cord, switch, or brush replacement may be practical. A burned motor, damaged controller, or cracked housing may not be.
Repair the tool when:
• The replacement part is available from the manufacturer.
• The housing, guard mount, and gear head are sound.
• The repair cost is reasonable.
• You have the correct tools and electrical knowledge.
• The grinder is a quality model used often.
Replace the tool when:
• The motor has burned windings.
• The housing is cracked near the gear head.
• The cord has severe internal damage.
• The battery pack is swollen or unsafe.
• Several major parts have failed.
• Repair costs approach the price of a new grinder.
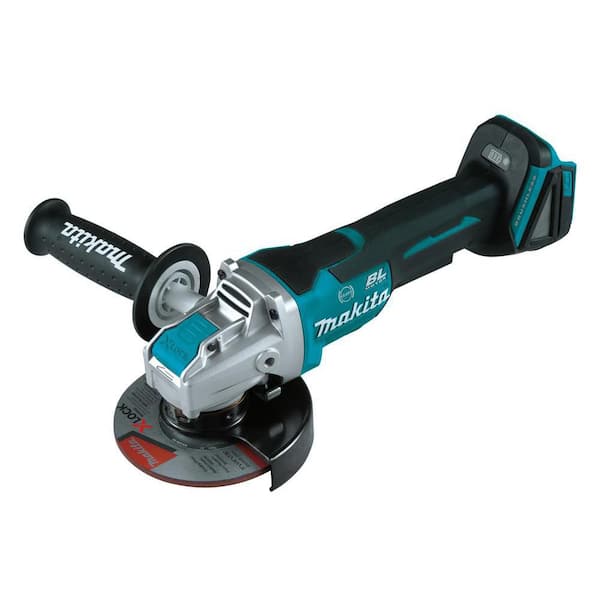
A replacement should include a proper guard, side handle, and compatible disc system. Choose a tool with overload protection and a reliable warranty when possible. Safety features are worth more than a small price difference.
Source: homedepot.com
How to prevent an angle grinder from failing
Good care reduces both electrical and mechanical stress. An angle grinder works best when you treat it like a small motor, not a disposable appliance.
Keep the ventilation slots clear. Dust blocks cooling air and can collect on electrical parts. After dusty work, blow debris away with clean, dry air while following the tool maker’s cleaning instructions.
Use the correct disc for the material and task. A cutting wheel is not a grinding wheel, and a disc with the wrong speed rating can break. Check the disc for cracks before use and never exceed its rated revolutions per minute.
Let the tool do the work. Pressing too hard slows the motor and raises heat. Make smooth cuts, avoid twisting the disc, and allow short cooling breaks during demanding jobs.
Store the grinder in a dry place. Keep the cord loosely coiled, not sharply folded. Remove the battery before storing a cordless model for a long period, and follow the battery maker’s storage guidance.
A simple maintenance list helps:
• Inspect the cord, plug, switch, guard, and handle before use.
• Clean vents after dusty jobs.
• Check discs for damage and correct ratings.
• Watch for unusual sparks, smell, noise, or vibration.
• Replace worn brushes before they damage the commutator.
• Service the grinder if it repeatedly overheats.
Frequently Asked Questions About Angle Grinder Won’t Turn On
Why won’t my angle grinder turn on even though the outlet works?
The fault may be in the power cord, switch, carbon brushes, motor, or internal wiring. Unplug the tool and inspect the cord, then check the switch and external brush caps if your model has them.
Why does my cordless angle grinder not turn on with a charged battery?
The battery may be too hot, too cold, damaged, incompatible, or locked in protection mode. Remove it, check for damage, charge it with the correct charger, and clean the tool contacts with a dry cloth.
Can worn carbon brushes stop an angle grinder from working?
Yes. Carbon brushes that are too short or damaged may lose contact with the motor. Signs include intermittent starting, heavy sparking, reduced power, and a burning smell.
Is it safe to reset an angle grinder after it overheats?
Let the tool cool completely and disconnect it from power before checking it. If it repeatedly overheats or trips protection during normal work, stop using it and have it inspected.
Should I replace an angle grinder switch myself?
You can replace the switch if you have electrical repair experience, the correct part, and the service instructions. Always unplug the tool or remove the battery, photograph the wiring, and test the tool only after the housing is correctly closed.
Why does my angle grinder hum but not spin?
A hum can mean the motor receives power but cannot start. A seized bearing, jammed gear, damaged armature, or electronic fault may be responsible, so disconnect the tool and avoid repeated start attempts.
Can a bad extension cord stop an angle grinder from starting?
Yes. A damaged or undersized extension cord can cause voltage drop, heat, and poor motor performance. Test the grinder directly from a suitable outlet, and replace any cord that is damaged.
Conclusion
When an angle grinder won’t turn on, start with the simplest causes: the outlet, breaker, cord, battery, charger, and switch. Then consider worn brushes, a seized motor, thermal protection, or a failed electronic controller. Disconnect the tool before inspection, and never bypass a safety device.
A careful diagnosis can save a good grinder, but a burned motor, damaged battery, or cracked housing is not worth risking your safety. Use the steps in this guide, follow the manufacturer’s manual, and ask a qualified repair professional when the fault reaches the electrical or battery system. Share your symptoms or repair experience in the comments, and explore more tool-care guides before your next project.