Jigsaw Cuts Crooked: Easy Fixes For Straighter Cuts
A crooked jigsaw cut usually comes from blade drift, a dull blade, poor support, or rushed technique.
When a jigsaw cuts crooked, the tool is often not the only problem. The blade may bend as it meets hard grain, the shoe may not sit flat, or the wrong blade may be forcing its way through the material. I have seen a clean-looking layout turn into a wavy cut simply because the blade was too narrow for the job. This guide explains why jigsaw cuts crooked, how to find the real cause, and how to make straighter cuts with simple changes.

Why does a jigsaw cut crooked?
A jigsaw cuts with a narrow blade that moves up and down at high speed. That thin blade can flex, twist, or drift away from the marked line. Unlike a circular saw, a jigsaw blade has less support, so small errors in setup can quickly become visible.
The most common causes include:
• A dull, bent, or damaged blade
• The wrong blade for the material
• Pushing the tool too fast
• Using too much side pressure
• Cutting with a loose or poorly fitted blade
• Holding the jigsaw at an angle
• Allowing the material to move
• Using an unsuitable orbital setting
• Starting a turn too sharply
A crooked jigsaw cut may also come from blade drift. Blade drift happens when the blade follows the grain or the path of least resistance instead of staying directly over the pencil line. This is common when cutting thick wood, plywood, or hardwood.
The shoe, also called the base plate, must stay flat against the workpiece. If the shoe lifts, rocks, or catches on debris, the blade can lean. Even a small tilt at the shoe can create a large error at the bottom of the cut.
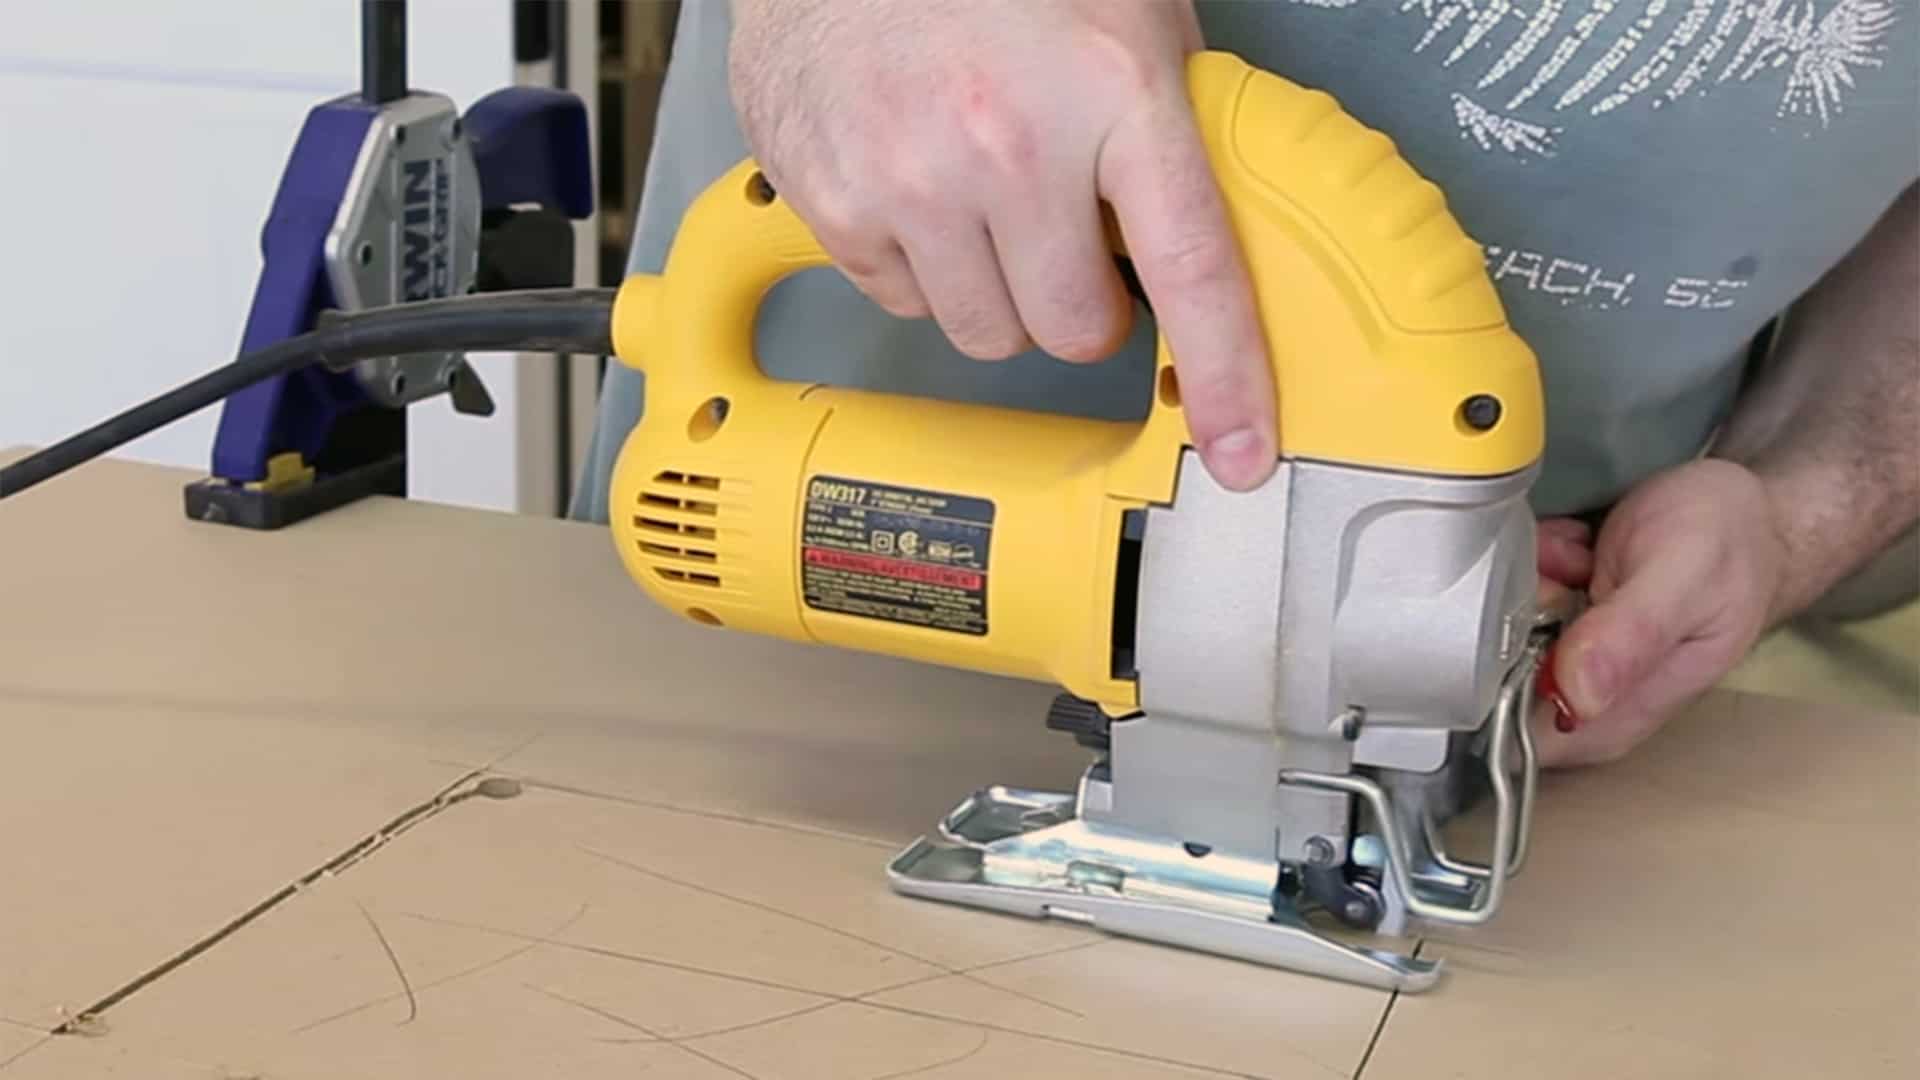
Check the blade before changing your technique
The blade is the first thing to inspect when a jigsaw cuts crooked. A poor blade can make good technique feel useless.
Remove the battery or unplug the tool before checking the blade. Look for these warning signs:
• Teeth that look rounded or worn
• A blade that is visibly bent
• Missing or damaged teeth
• Burn marks on the blade
• A blade that does not sit straight in the holder
• Excessive vibration during the cut
A dull blade needs more force to cut. That extra force makes the blade flex, which often causes a crooked cut. A bent blade can drift from the line even when you guide the jigsaw carefully.
Choose the blade based on the material and the result you want. A fine tooth blade works well for clean cuts in plywood, laminate, and thin wood. A coarse tooth blade removes material faster but may leave a rougher edge.
For metal, use a metal cutting blade with small, closely spaced teeth. For plastic, use a blade designed to reduce melting and chipping. A wood blade should not be used as a general-purpose solution for every material.
A useful rule is simple: use a sharp, suitable blade and let it do the work. If you need to force the tool forward, the blade may be wrong, worn, or moving too slowly.

Use the right blade for straight and curved cuts
The best blade for a straight cut is not always the best blade for a curved cut. Blade width, tooth design, and tooth count all affect control.
Wide blades are usually more stable for straight cuts. They resist twisting and are less likely to wander. Narrow blades are better for tight curves, but they can bend more easily during a long or deep cut.
Consider these blade choices:
• Wide blade: Best for long, fairly straight cuts
• Narrow blade: Best for curves and small cutouts
• Fine tooth blade: Best for a smoother finish
• Coarse tooth blade: Best for fast cuts in thicker wood
• Down cutting blade: Helps reduce chips on the top surface
• Up cutting blade: Often cuts faster but may chip the top face
To reduce splintering, place the finished face down when using a standard up cutting blade. If the finished face must stay up, use a down cutting blade or apply painter’s tape over the cut line.
Blade length matters too. The blade should extend through the workpiece during the full stroke. A blade that is too short may catch or overheat. A blade that is far longer than needed may vibrate more than necessary.
Slow down and guide the jigsaw correctly
Many people push a jigsaw too quickly. This is one of the main reasons a jigsaw cuts crooked. The blade needs time to remove material and clear sawdust from the cut.
Start the tool before the blade touches the material. Set the shoe flat, then move forward at a steady pace. Do not force the jigsaw when the motor slows or the blade begins to bend.
Keep both hands in safe positions:
• One hand holds the rear handle and controls the trigger
• The other hand guides the front of the tool
• Keep both hands away from the blade path
• Never place a hand beneath the workpiece
Use your eyes to watch the blade, not only the pencil line. The blade may appear to follow the line from above while drifting below it. This is especially common in thick wood.
When turning, make gradual movements. Do not twist the tool sharply while pushing forward. For a tight curve, slow down and allow the blade to turn. If the curve is too tight for the blade, drill a relief hole or use a narrower blade.
From my own workshop experience, the biggest improvement often comes from using less force. A jigsaw should feel guided, not pushed. When the cut starts to wander, stopping for a moment is better than trying to correct it with a hard sideways movement.

Keep the workpiece stable and supported
A moving workpiece can make a straight cut look like a tool problem. Clamp the material firmly before you begin. If the board shifts, the blade may bind, bend, or follow a new path.
Support the material close to the cut line, but do not place a support where the blade will hit it. Long boards need support on both sides of the cut when possible. This reduces vibration and prevents the waste piece from breaking away too early.
For sheet goods, use a workbench, sawhorses, or foam insulation beneath the panel. Foam support is useful because it supports the full sheet while allowing the blade to pass through safely.
Check the following before cutting:
• The workpiece does not rock
• Clamps do not block the jigsaw
• The cut line is easy to see
• The waste side is supported
• The shoe can remain flat
• The blade will not hit a clamp or hidden fastener
Thin plywood can vibrate like a drum. Add support beneath it or clamp a straight scrap board along the edge. This gives the jigsaw a more stable path and can reduce roughness.

Adjust speed and orbital action
Jigsaws often have variable speed and orbital settings. These controls affect both cutting speed and accuracy.
A high speed can work well for thin wood, but it may cause heat, vibration, or blade drift in thick material. A slower speed gives you more control in metal, plastic, and delicate laminates.
Orbital action moves the blade slightly forward during part of its stroke. This can speed up wood cutting, but it also makes the tool more aggressive. High orbital action may increase splintering and make a curved or detailed cut harder to control.
Use these general settings:
• Low speed and low orbital action for metal
• Medium speed for plastic and laminate
• Medium or high speed for thin wood
• Low orbital action for clean curves
• Higher orbital action for fast, rough wood cuts
These are starting points, not fixed rules. The correct setting depends on the blade, material thickness, and desired finish. Always test the setup on a scrap piece first.
If a jigsaw cuts crooked during a curve, reduce the speed and orbital action. If it cuts slowly but stays straight, the issue may be control rather than power.

Make a straight jigsaw cut with a guide
A straightedge can greatly improve accuracy. Clamp a straight board or metal guide parallel to the cut line. Let the edge of the jigsaw shoe ride against the guide as you move forward.
Before clamping the guide, measure the distance from the blade to the edge of the shoe. Add or subtract this distance from your layout line. Do not place the guide directly on the pencil line unless the offset has been measured.
Follow these steps:
-
Mark the cut line clearly.
-
Measure the shoe offset from the blade.
-
Position the guide using that measurement.
-
Clamp the guide at both ends.
-
Make sure the clamps do not interfere with the tool.
-
Test the setup on scrap.
-
Start the jigsaw and move at a steady speed.
A guide cannot fix a bent blade or a loose shoe. It only helps when the tool is in good condition and the shoe stays against the guide.
For very long or highly accurate cuts, a circular saw with a guide rail may be a better tool. A jigsaw is excellent for curves, openings, and short cuts. It has limits, and knowing those limits prevents frustration.
Inspect the jigsaw itself
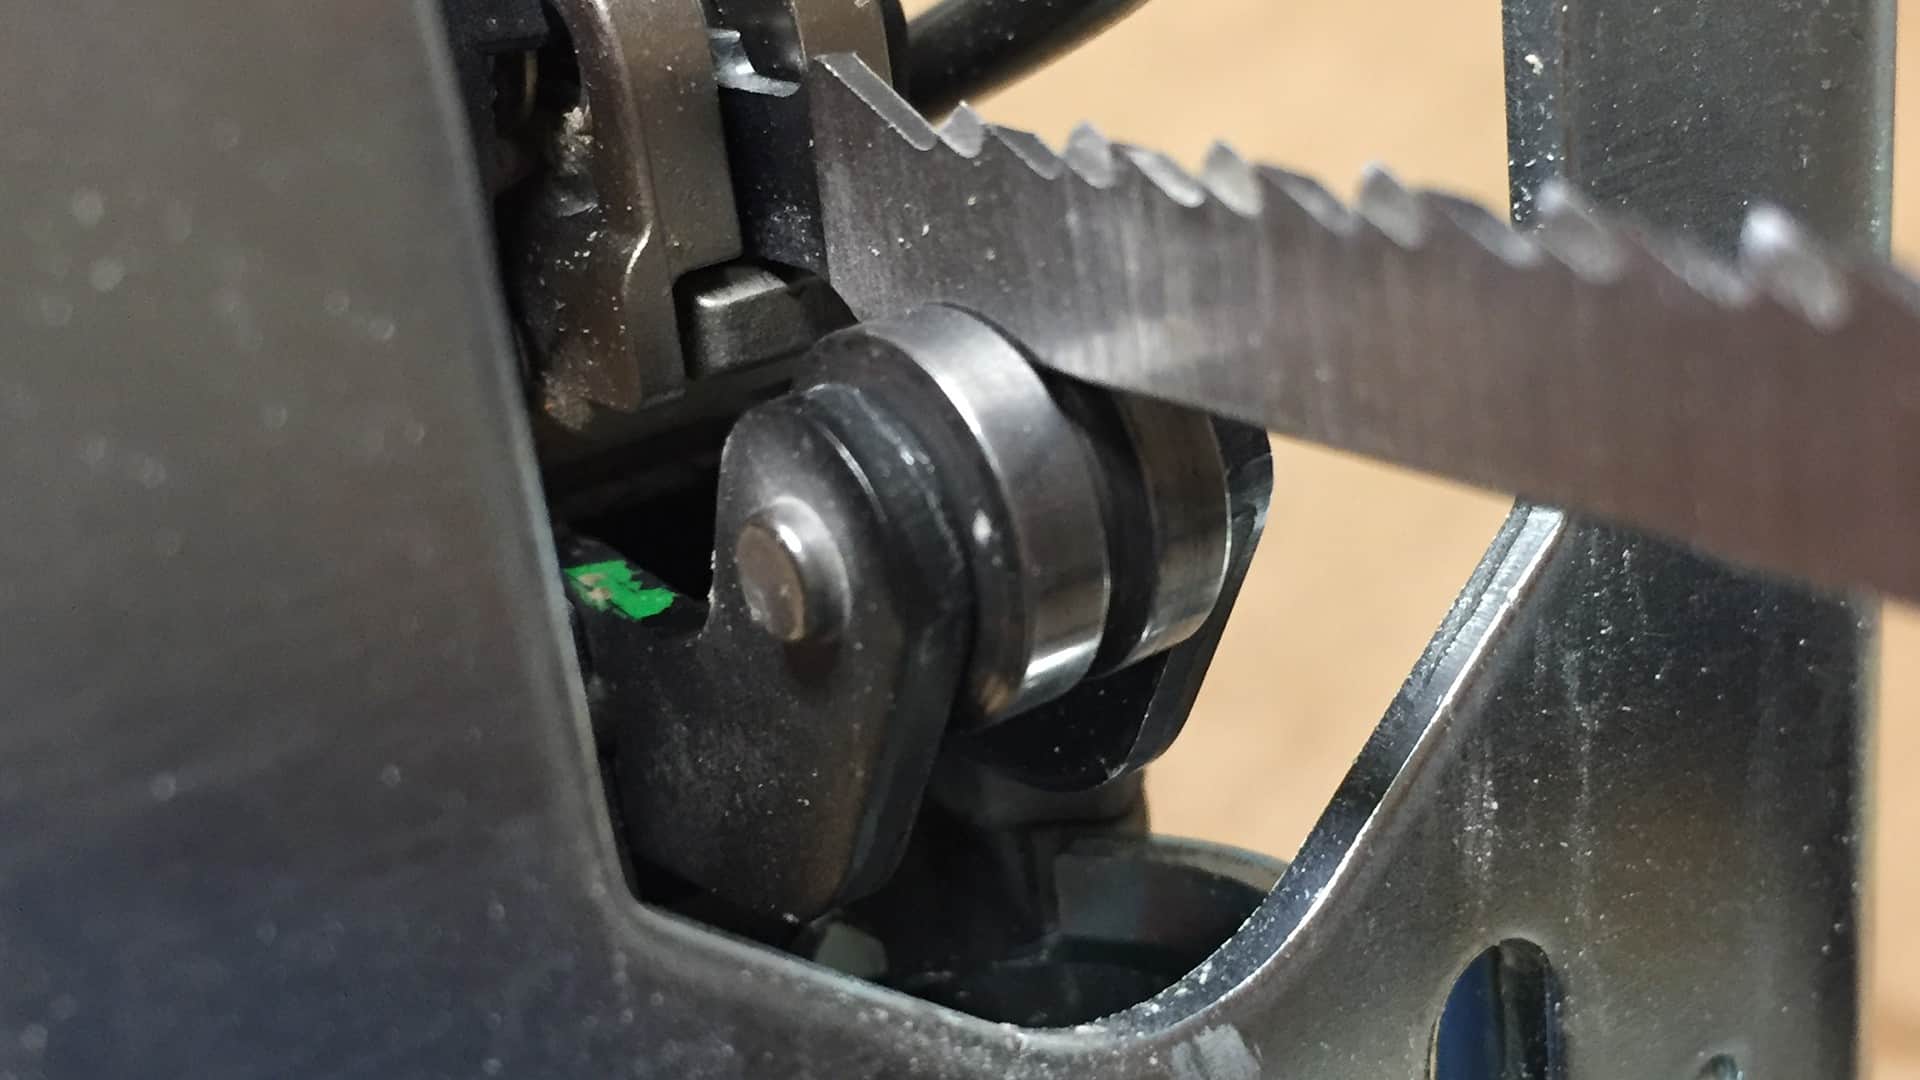
If a jigsaw cuts crooked with several new blades, inspect the tool. The blade holder may be worn, dirty, or damaged. The guide roller behind the blade may also be loose or unable to support the blade correctly.
Unplug the tool or remove its battery before inspection. Check that:
• The blade locks firmly
• The blade holder is clean
• The guide roller turns freely
• The shoe is tight
• The shoe is square to the blade
• The power cord or battery connection is secure
The guide roller should touch the back of the blade without stopping its movement. If the roller sits too far away, the blade may flex. If it presses too hard, the blade may bind.
Place a small square against the shoe and blade to check alignment. Do this only when the tool is off and safe to handle. If the shoe is bent or the blade holder has play, repair or replacement may be needed.
Do not keep using a tool that sparks heavily, smells like burning insulation, or has unusual movement. Electrical and mechanical faults require qualified service. A straight cut is not worth risking injury.

Avoid common mistakes that cause crooked cuts
Small habits can create large errors. One common mistake is trying to correct the blade with strong side pressure. This can bend the blade and make the cut worse.
Another mistake is starting from the wrong side of the material. Plan which face should look best, then choose the blade and cutting direction to protect that face.
Avoid these habits:
• Cutting without clamping the workpiece
• Using a worn blade to save time
• Pushing through a turn
• Watching only the top of the cut
• Cutting through hidden nails or screws
• Letting sawdust cover the line
• Using maximum speed for every material
• Starting a cut with the blade already touching the wood
• Lifting the shoe during a cut
A short stop can save a full panel. If the blade starts to drift, turn off the jigsaw, let it stop, and inspect the cut. Do not pull the tool backward while the blade is moving.
I once ruined a cabinet side by trying to “steer” a drifting blade back to the line. The top looked acceptable, but the bottom had moved nearly an eighth of an inch. Since then, I stop early, change the blade, and restart only after finding the cause.
How to cut straight lines, curves, and thick wood
Different cuts need different methods. A straight line benefits from a wide blade and a guide. A curve needs a narrow blade, slower movement, and careful control.
For a straight cut:
• Use a wide, sharp blade
• Clamp a guide when accuracy matters
• Keep the shoe flat
• Move at a steady pace
For a curved cut:
• Use a narrow curve-cutting blade
• Mark the curve clearly
• Reduce speed before the turn
• Make relief cuts in waste areas
For thick wood:
• Choose a long, sturdy blade
• Use a lower feed rate
• Allow the blade to clear sawdust
• Check both sides for blade drift
• Cut in stages if the material is very thick
Relief cuts are short cuts made from the waste edge toward a curved line. They remove excess material and give the blade room to turn. This method reduces the side pressure that can make a jigsaw cut crooked.
For thick stock, check the bottom face after a test cut. The blade may enter on the line but leave several millimeters away from it. If that happens, use a sturdier blade, slow down, and support the material better.
Improve cut quality and safety
A clean cut is useful, but safe work comes first. Wear safety glasses to protect your eyes from chips and dust. Hearing protection is wise during long cutting sessions, especially with high-speed tools.
Keep the blade path clear. Do not reach across the cut while the jigsaw is running. Wait for the blade to stop before setting the tool down.
Dust control also helps accuracy. A clear line is easier to follow than one hidden under sawdust. Use the jigsaw’s dust blower, connect a vacuum if supported, or pause to clear the line safely.
For treated wood, painted surfaces, plastics, and unknown materials, check the material risks before cutting. Some coatings and plastics can release harmful dust or fumes. Use suitable ventilation and respiratory protection where needed.
Industry safety guidance consistently stresses eye protection, secure workpieces, and keeping hands away from moving blades. These steps are simple, but they prevent many common workshop injuries.
A quick troubleshooting checklist
When a jigsaw cuts crooked, use this order. It helps you solve the problem without changing many things at once.
-
Stop the tool and remove the battery or unplug it.
-
Replace the blade if it is dull, bent, or unsuitable.
-
Check that the blade is locked in place.
-
Inspect the guide roller and shoe.
-
Clamp the workpiece firmly.
-
Choose a blade suited to the material.
-
Reduce feed pressure.
-
Lower the speed or orbital setting if the blade wanders.
-
Test the cut on scrap material.
-
Use a straightedge for long, straight cuts.
Change one factor at a time. If you replace the blade, change the speed, move the guide, and alter your technique all at once, you may not know what solved the problem.
A test cut is not wasted material. It is a small investment that protects the final piece.
Frequently Asked Questions of Jigsaw cuts crooked
Why does my jigsaw cut crooked even with a new blade?
A new blade may still be the wrong type, too narrow, or unsuitable for the material thickness. Check the shoe, guide roller, workpiece support, cutting speed, and feed pressure.
How do I stop a jigsaw blade from bending?
Use a sharp blade with enough width and length for the job. Keep the shoe flat, reduce forward pressure, and slow down before curves or thick sections.
Is a jigsaw good for making straight cuts?
A jigsaw can make straight cuts, especially with a wide blade and clamped guide. For long cuts that need very high accuracy, a circular saw with a straightedge or guide rail is usually better.
Which jigsaw blade is best for straight cuts?
A wide, sharp blade with a suitable tooth pattern is usually best for straight cuts in wood. The blade must also match the material and thickness.
Why is the bottom of my jigsaw cut crooked?
The blade may be drifting as it passes through the material. Thick stock, side pressure, poor support, a dull blade, and an angled shoe can all cause the bottom of the cut to move away from the top line.
Should I use orbital action when making a precise cut?
Use low or no orbital action for precise cuts and curves. Higher orbital action can cut wood faster, but it may increase vibration, splintering, and blade drift.
Conclusion
A jigsaw cuts crooked when the blade, tool, material, or technique is out of balance. Start with a sharp blade, secure the workpiece, keep the shoe flat, and guide the tool with steady pressure. Use a wide blade and straightedge for straight cuts, then slow down for curves and thick stock.
Do not fight a drifting blade. Stop, inspect the setup, and correct the cause before continuing. Test these steps on scrap wood, then apply what works to your finished project. Share your own jigsaw tips or explore more tool guides to improve your next cut.